Departure – 5 weeks on the road

Keep on truckin’

Tuesday (May 25): Today marks the beginning of a five week road trip. Destinations include the Oregon and Washington coast, central Oregon and the Lassen area of Northern California. I’ll spend the last six days at a Lassen campground attending an A-frame camper get together.

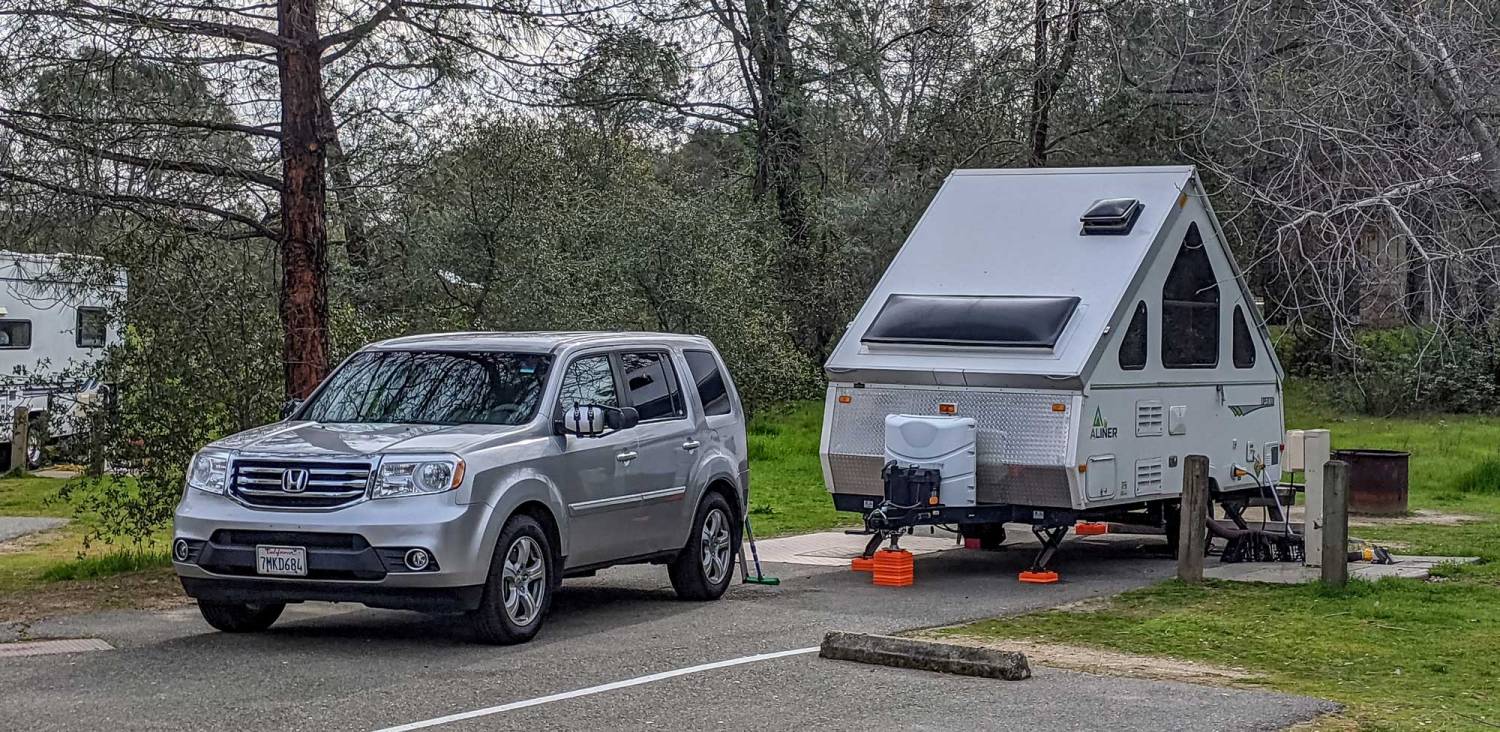
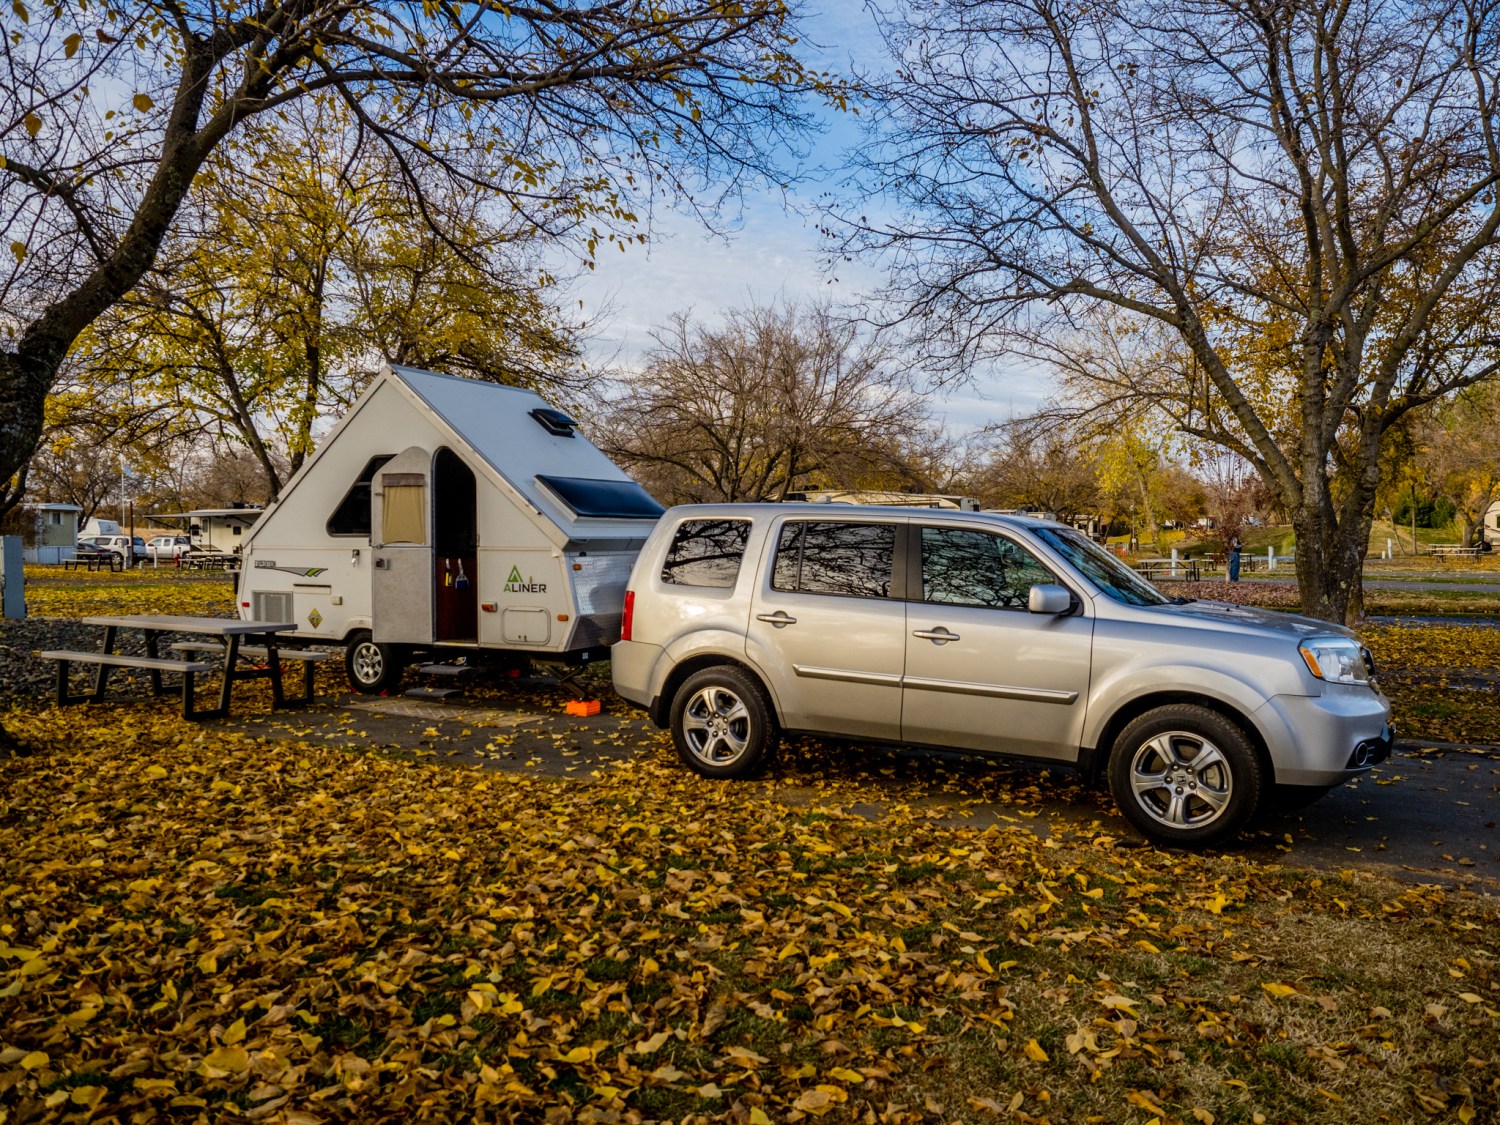
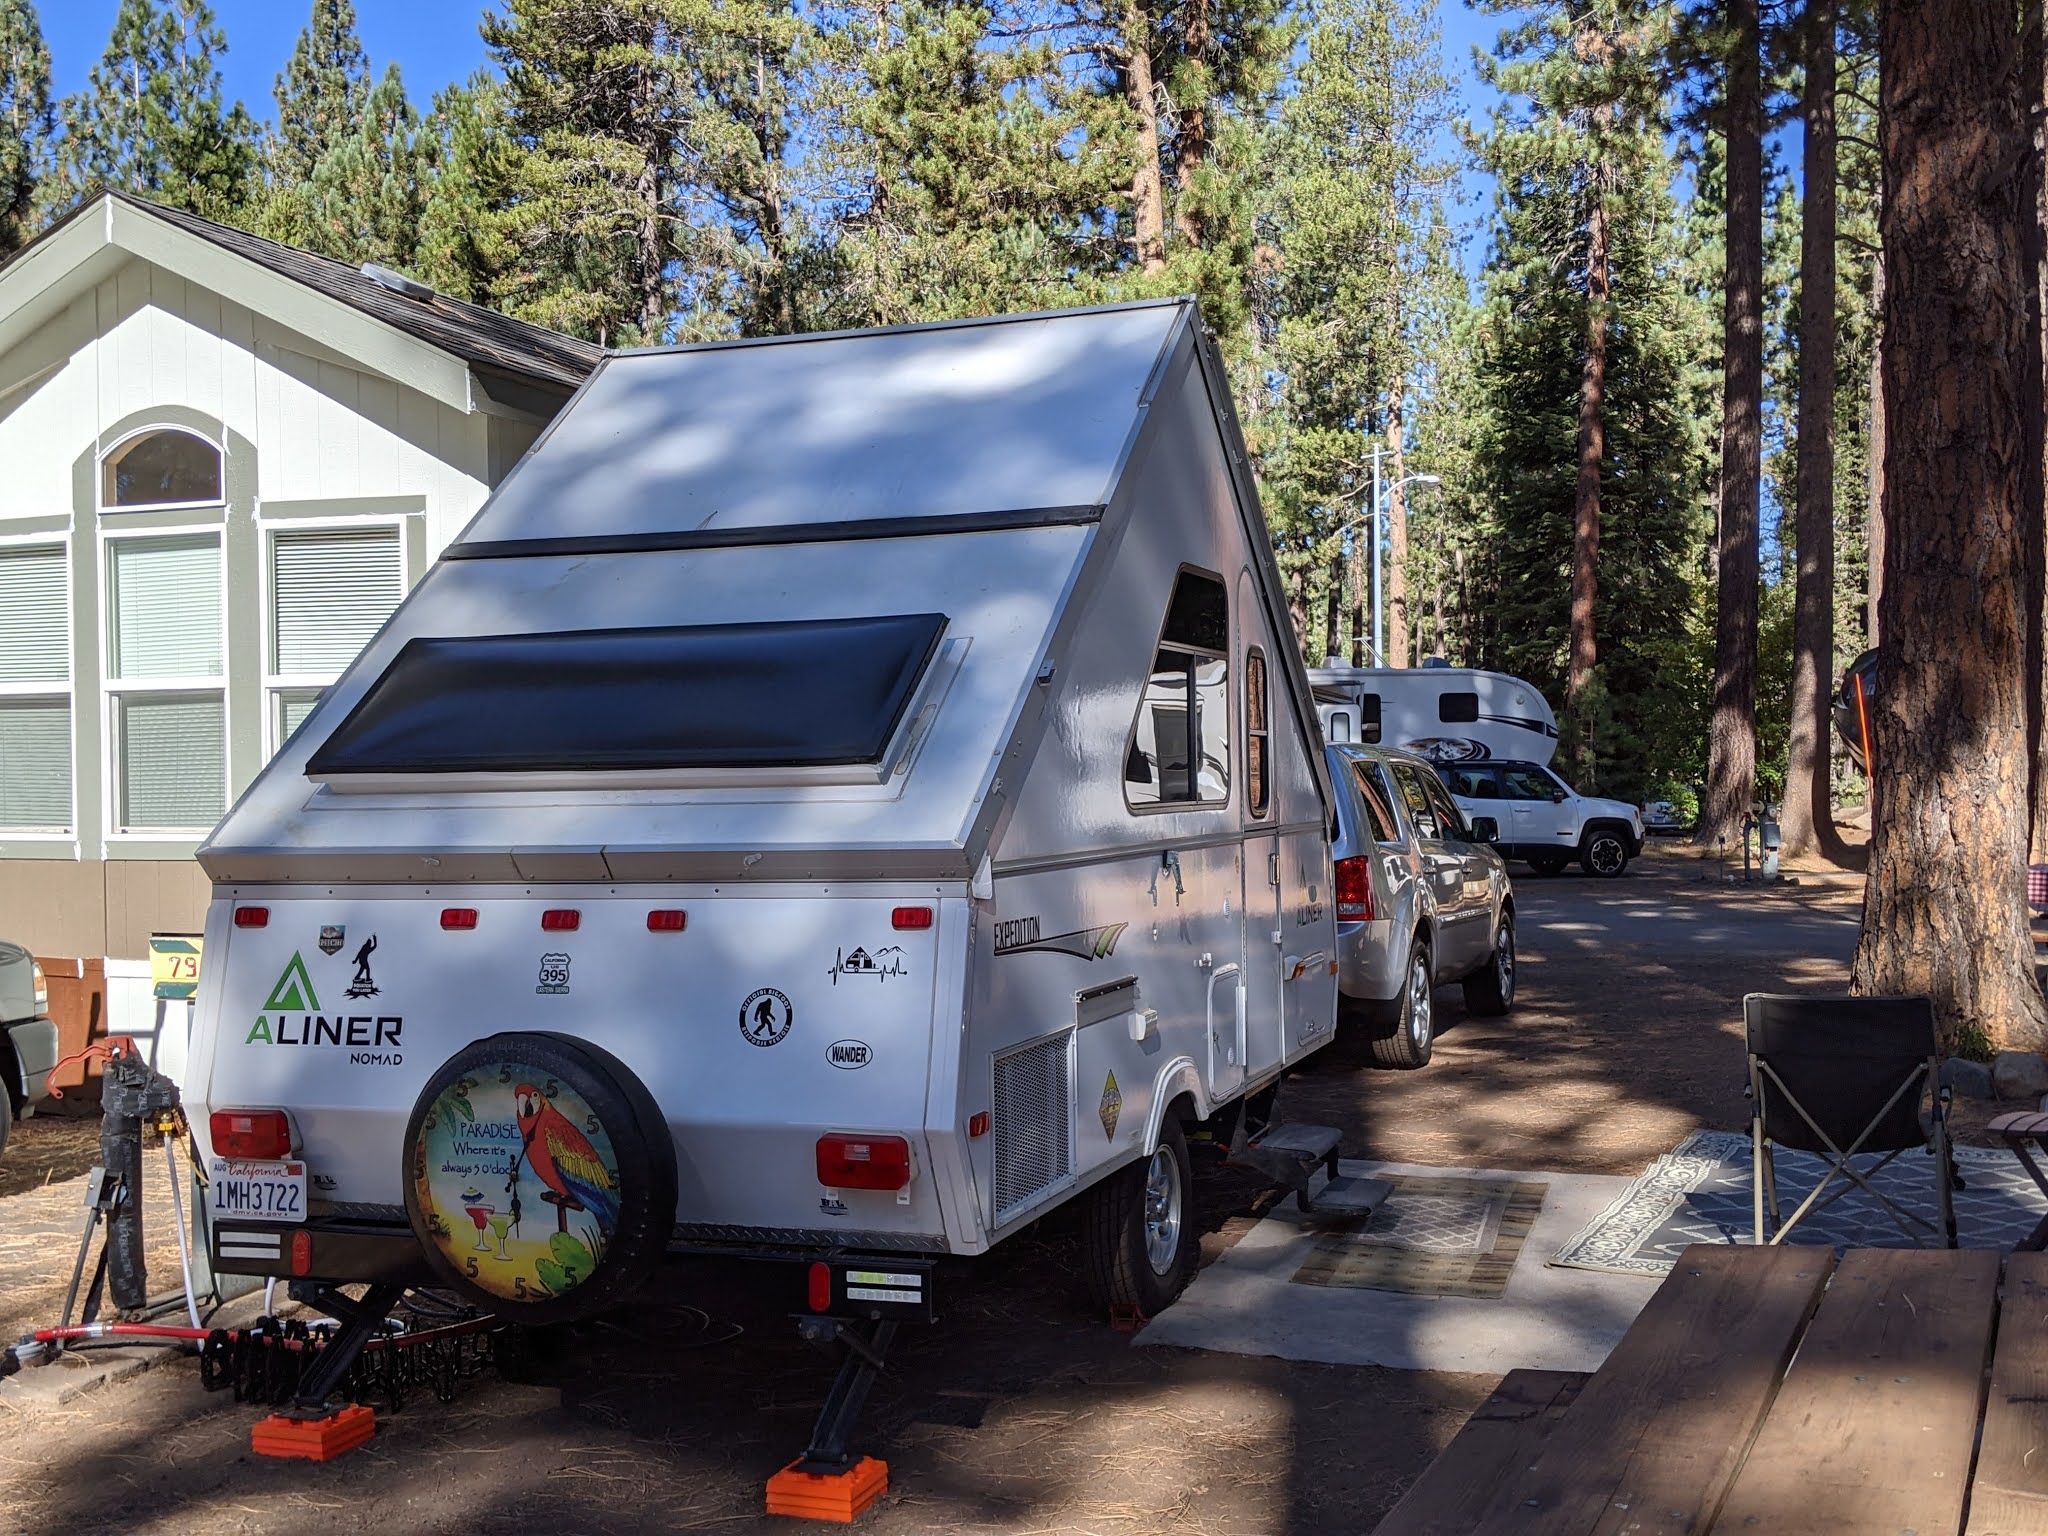
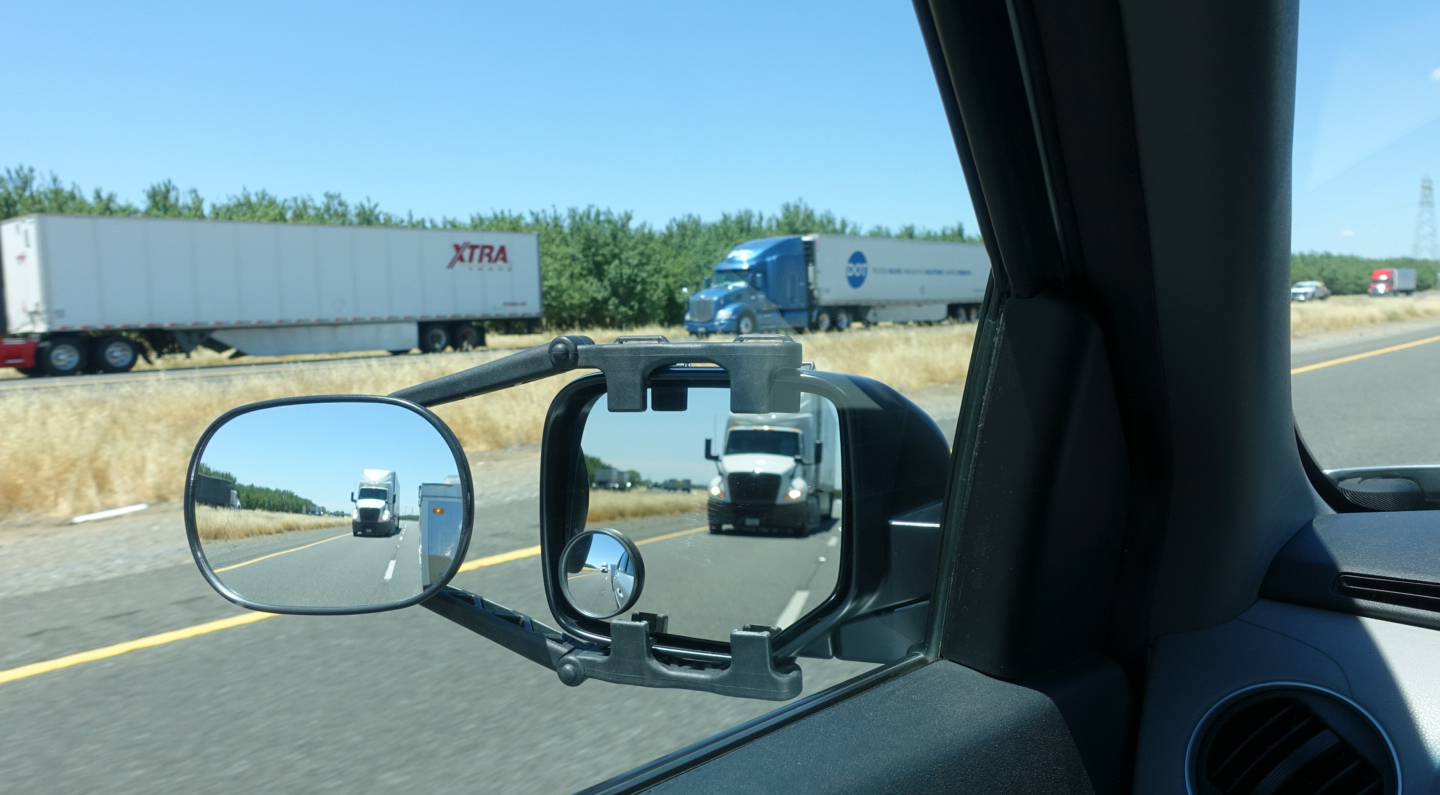
With the Pilot and Aliner fully packed, I hit the road around 11:30am. Interstate 5 was predictably crowded with truckers; this is a major north/south transportation corridor. I headed north to Williams, then west to Highway 101, and continued north on 101 to Burlington Campground along the Avenue of the Giants. I planned to stay overnight there to break up the drive.

Burlington Campground – Avenue of the Giants

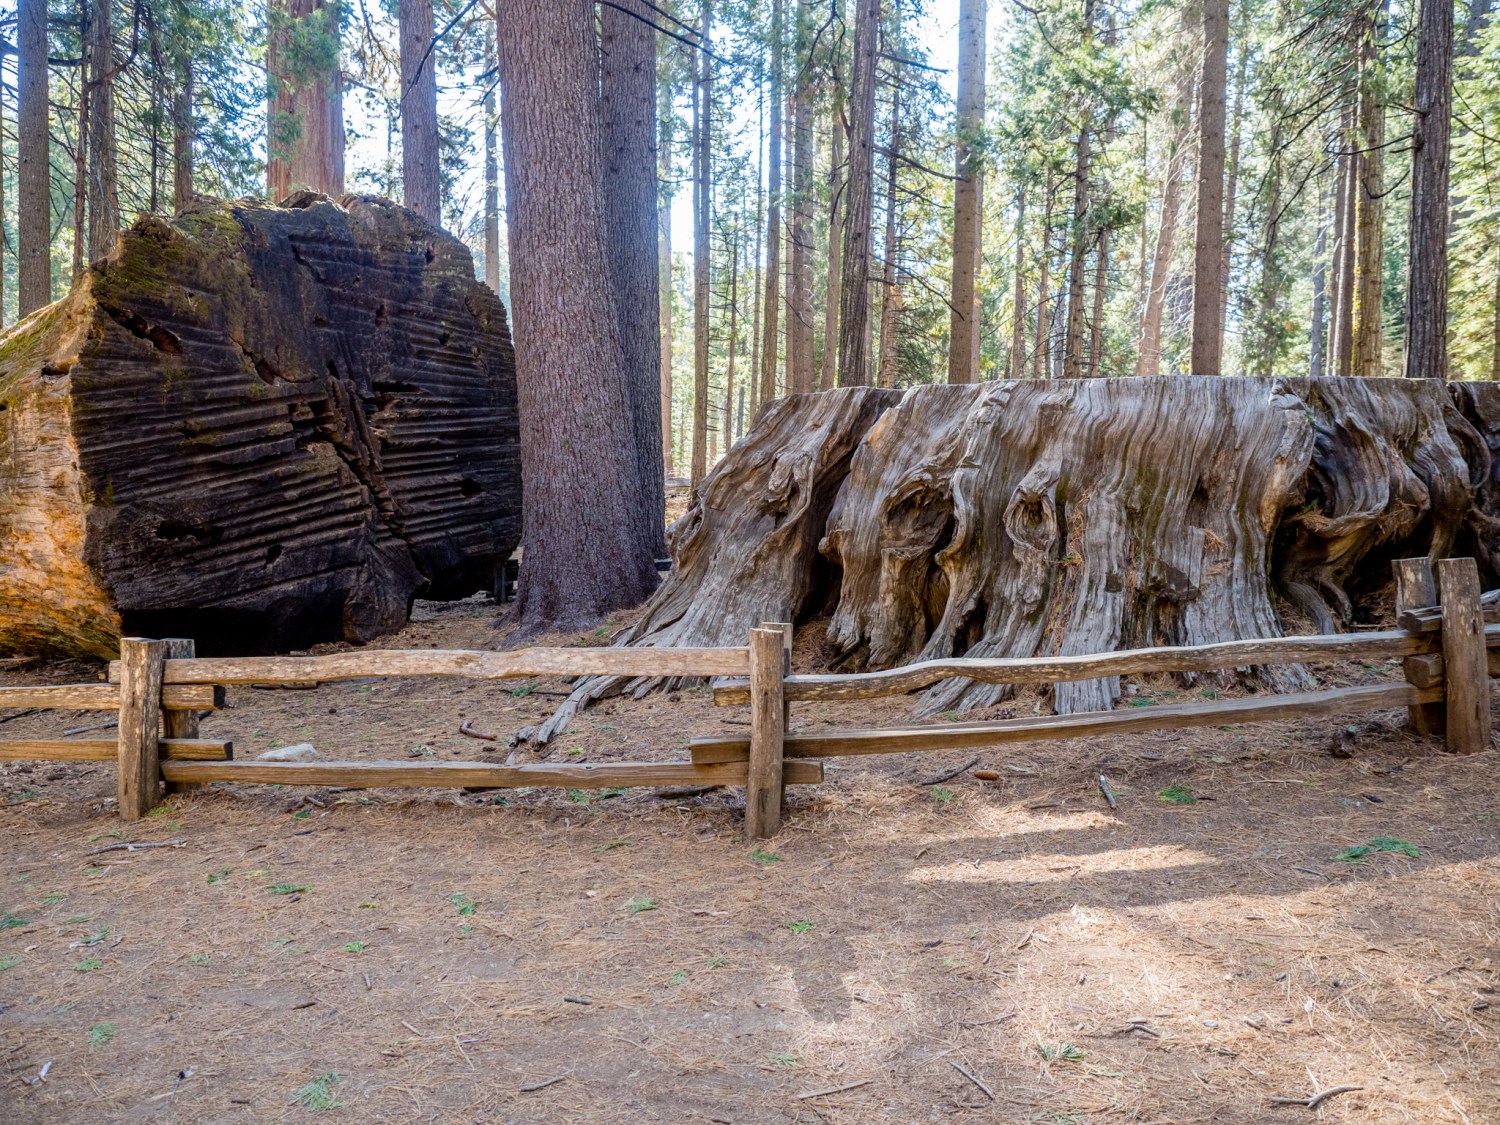
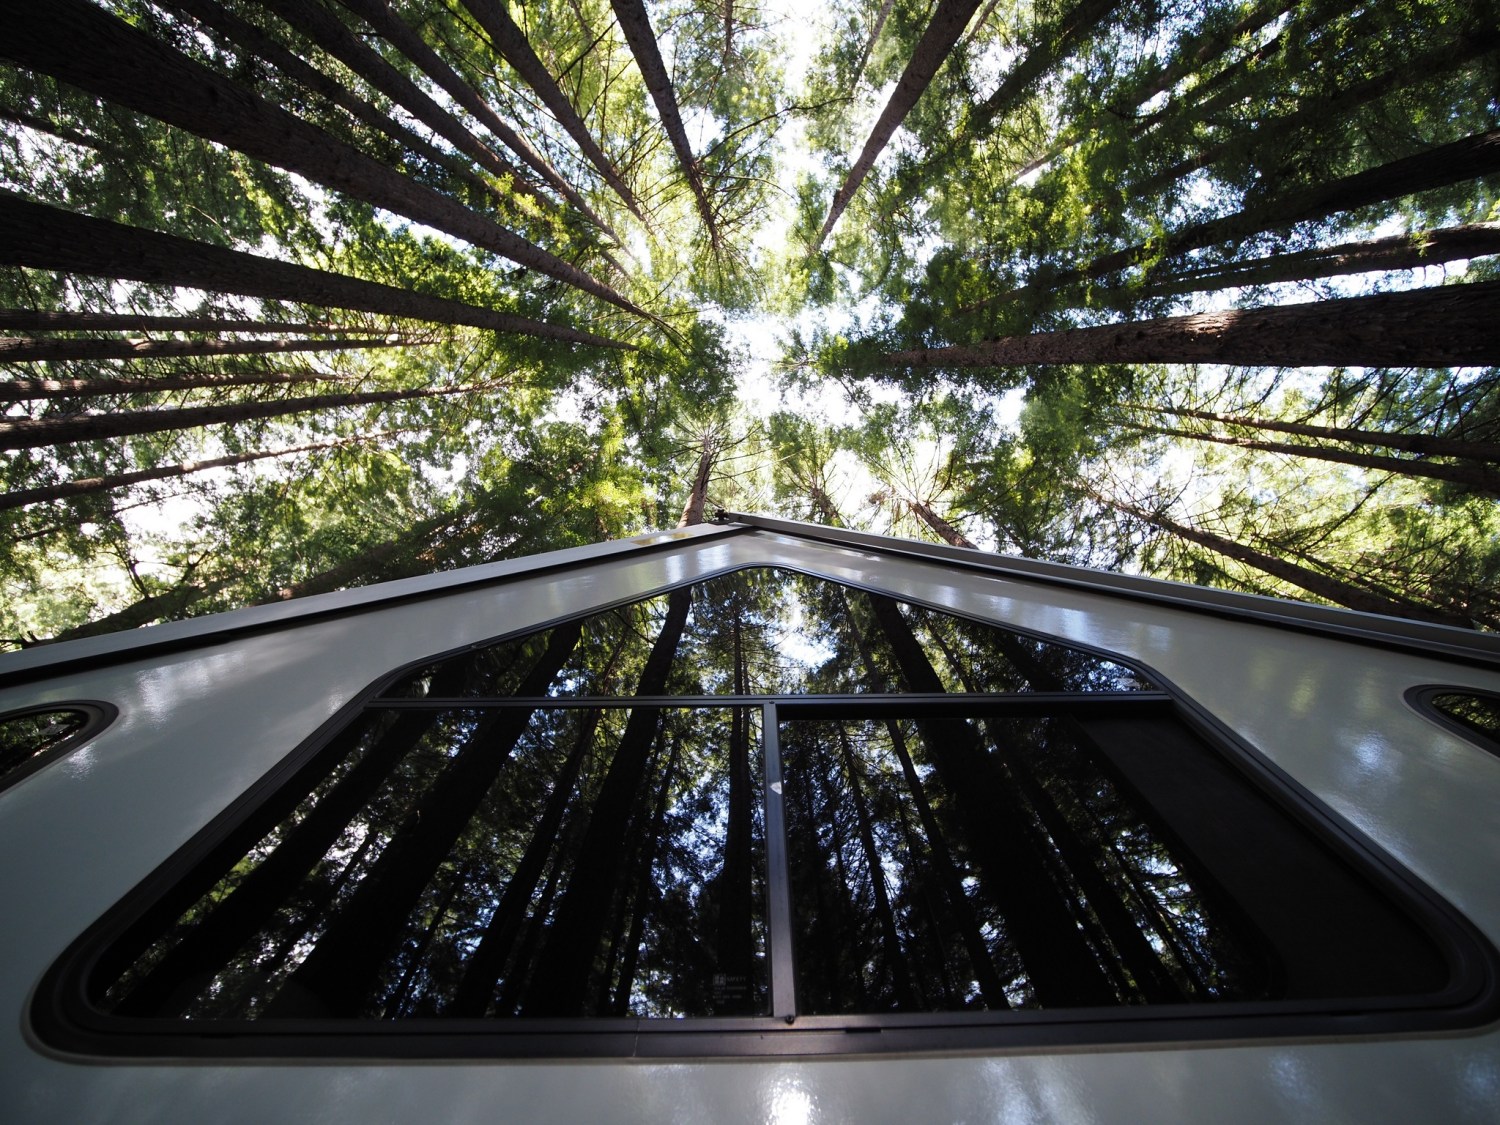
Burlington Campground is beautiful. The campsites are spread among the towering redwood trees (aka – the “Giants”). The campsites are designed for tent camping and small trailers. Several bicycle campers were staying there, as well as motorcycle campers and a few other trailers or Sprinter-type vehicles. On-site restrooms and showers are available, as well as a handy dish-washing station.

Looking up – a terrific way to wake up in the redwoods

On Wednesday morning (May 26), I continued on my journey northward. Costco in Eureka was a popular (and affordable) place to buy gas and a forgotten loaf of bread. (Well, at Costco, you can’t buy just one loaf of bread)

Continuing north on HWY101, I noticed a couple of emergency road signs warning drivers of road restrictions ahead. The words “2 hour delay” got my attention. I pulled off the highway for a break and consulted the CalTrans website for more info. I learned a rock slide near Crescent City was under repair, with regular road closures (2 hours at a time) alternating with one-lane road openings for an hour. It turned out to be a one hour delay, so not a big deal. At least the road was open enough to get through. There were no desirable alternative routes.

Waiting for the road to open

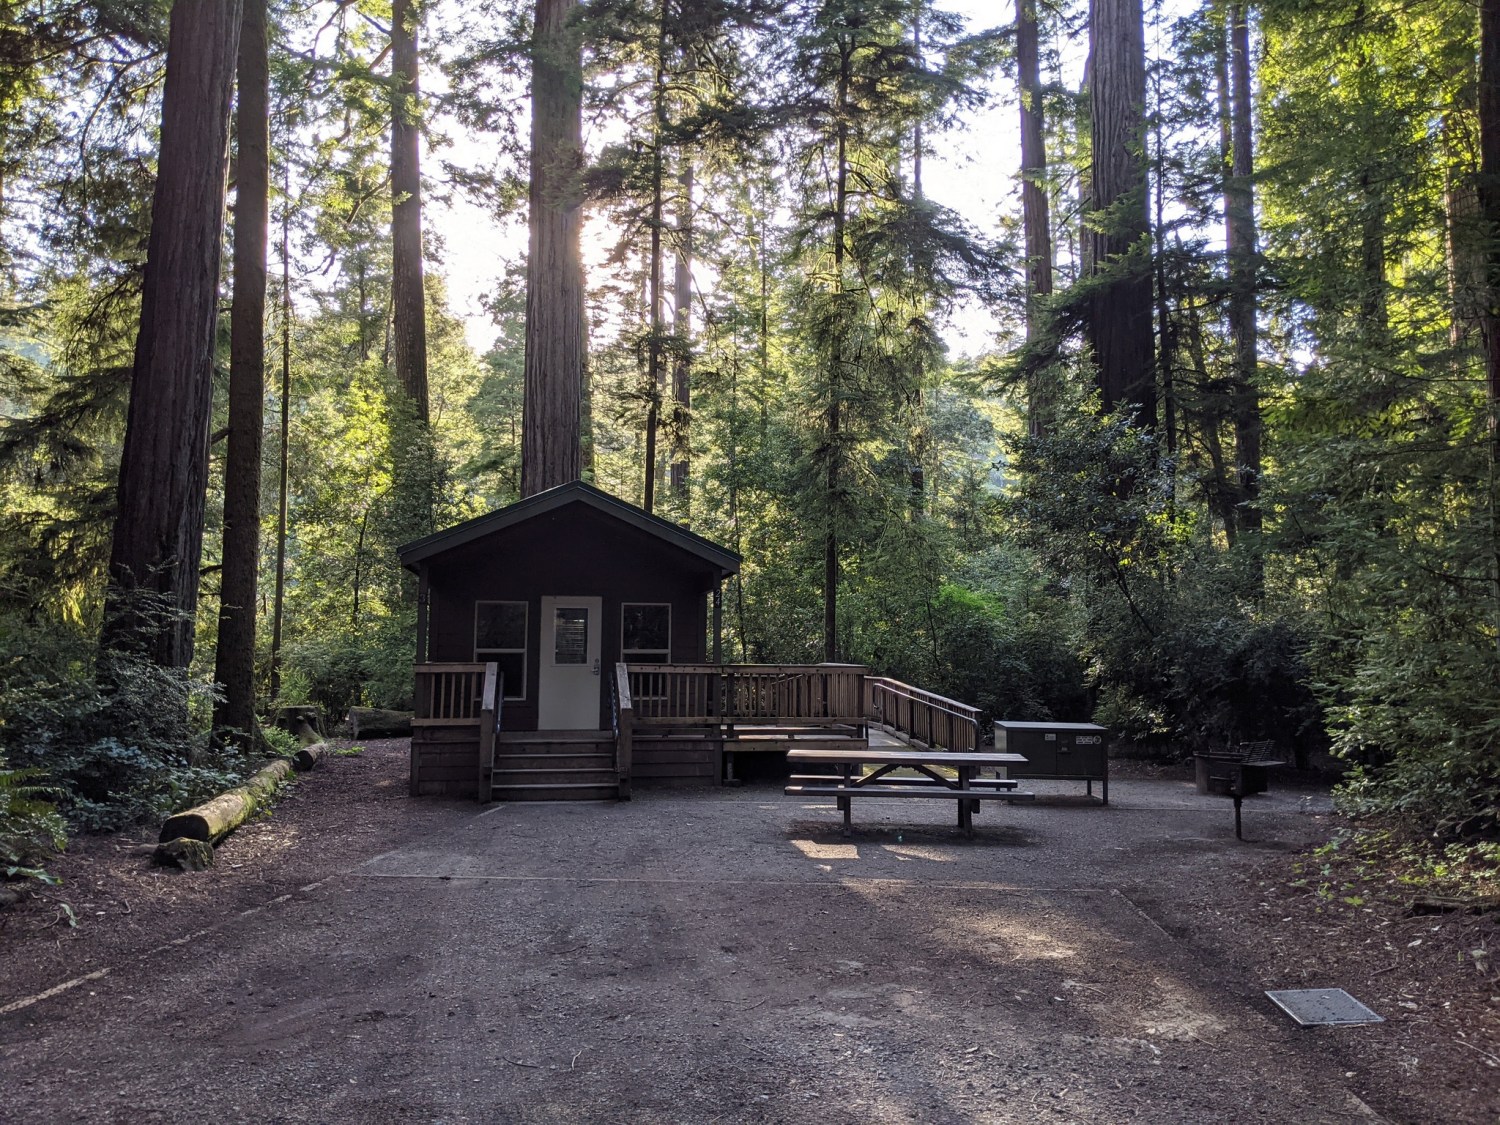
I arrived at Jedediah Smith Redwoods State Park in the later afternoon and set up in my campsite. I’ll be staying here for 3 nights. Another great campground! In the section I’m in, there are just a few spaces, and they are far apart. I’m surrounded by tall redwoods, layers of ferns and peace and quiet.

Space #77 at Jedediah Smith Redwoods State Park

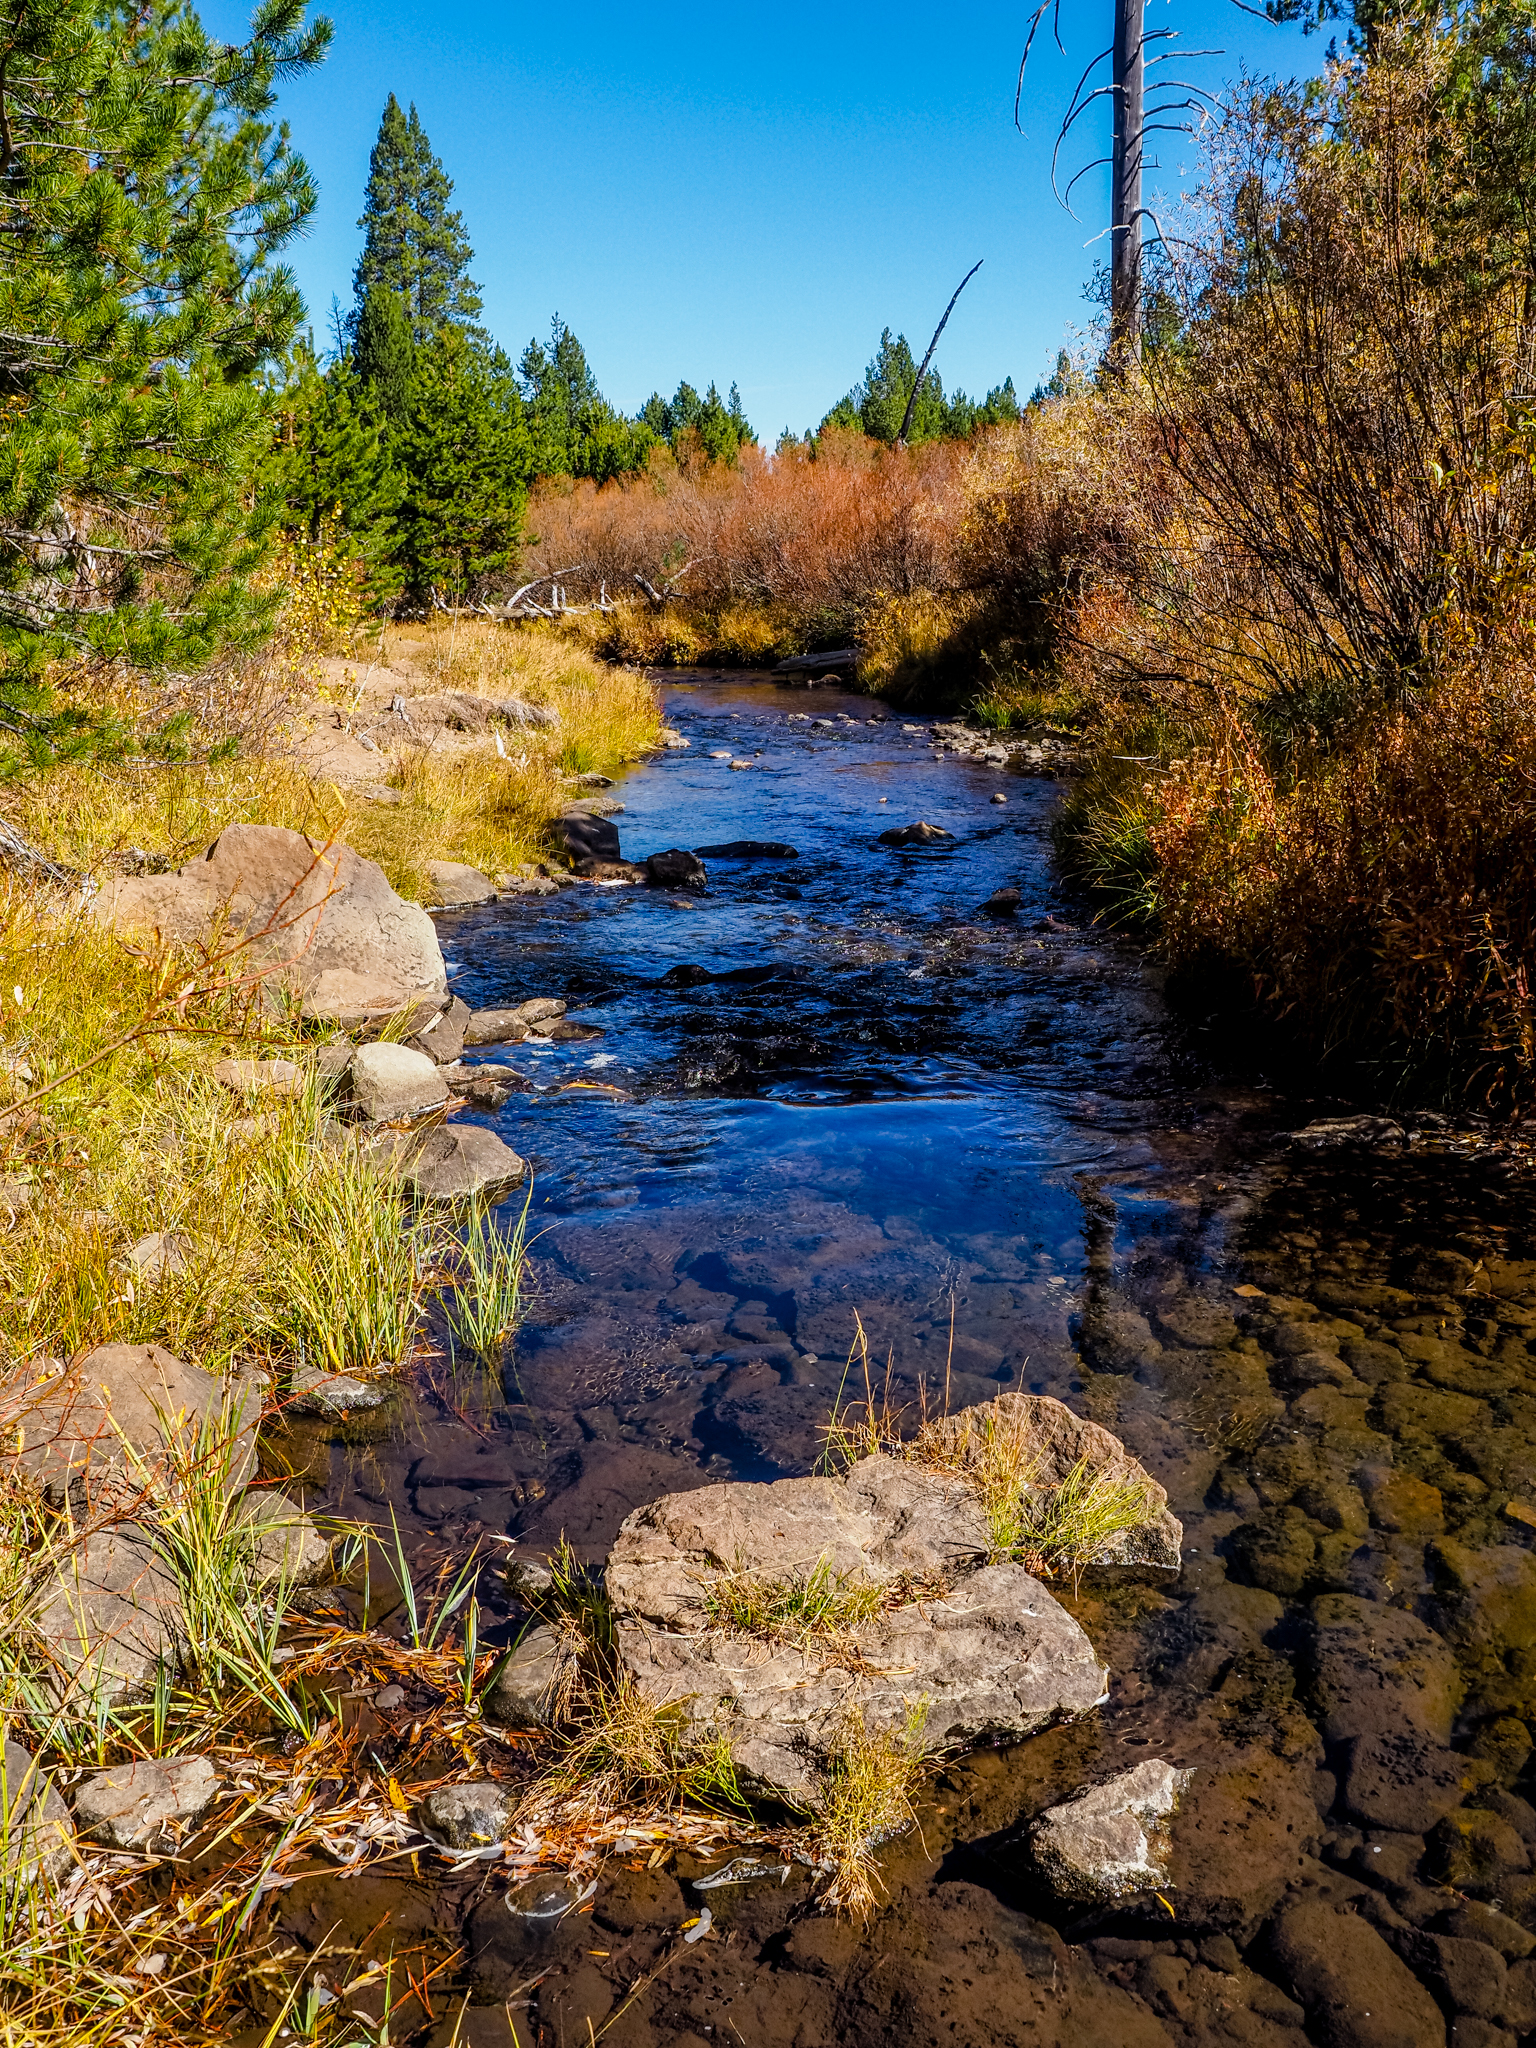
The campground has about 120 campsites, along with a few tiny cabins for rent. The Smith River borders one side of the campground. In the distance, I can hear the faint sounds of HWY 199, which connects Crescent City with Grants Pass, Oregon. Again, excellent restrooms and hot showers are available.

Camping among the redwoods and ferns
Small cabins are also available for rent

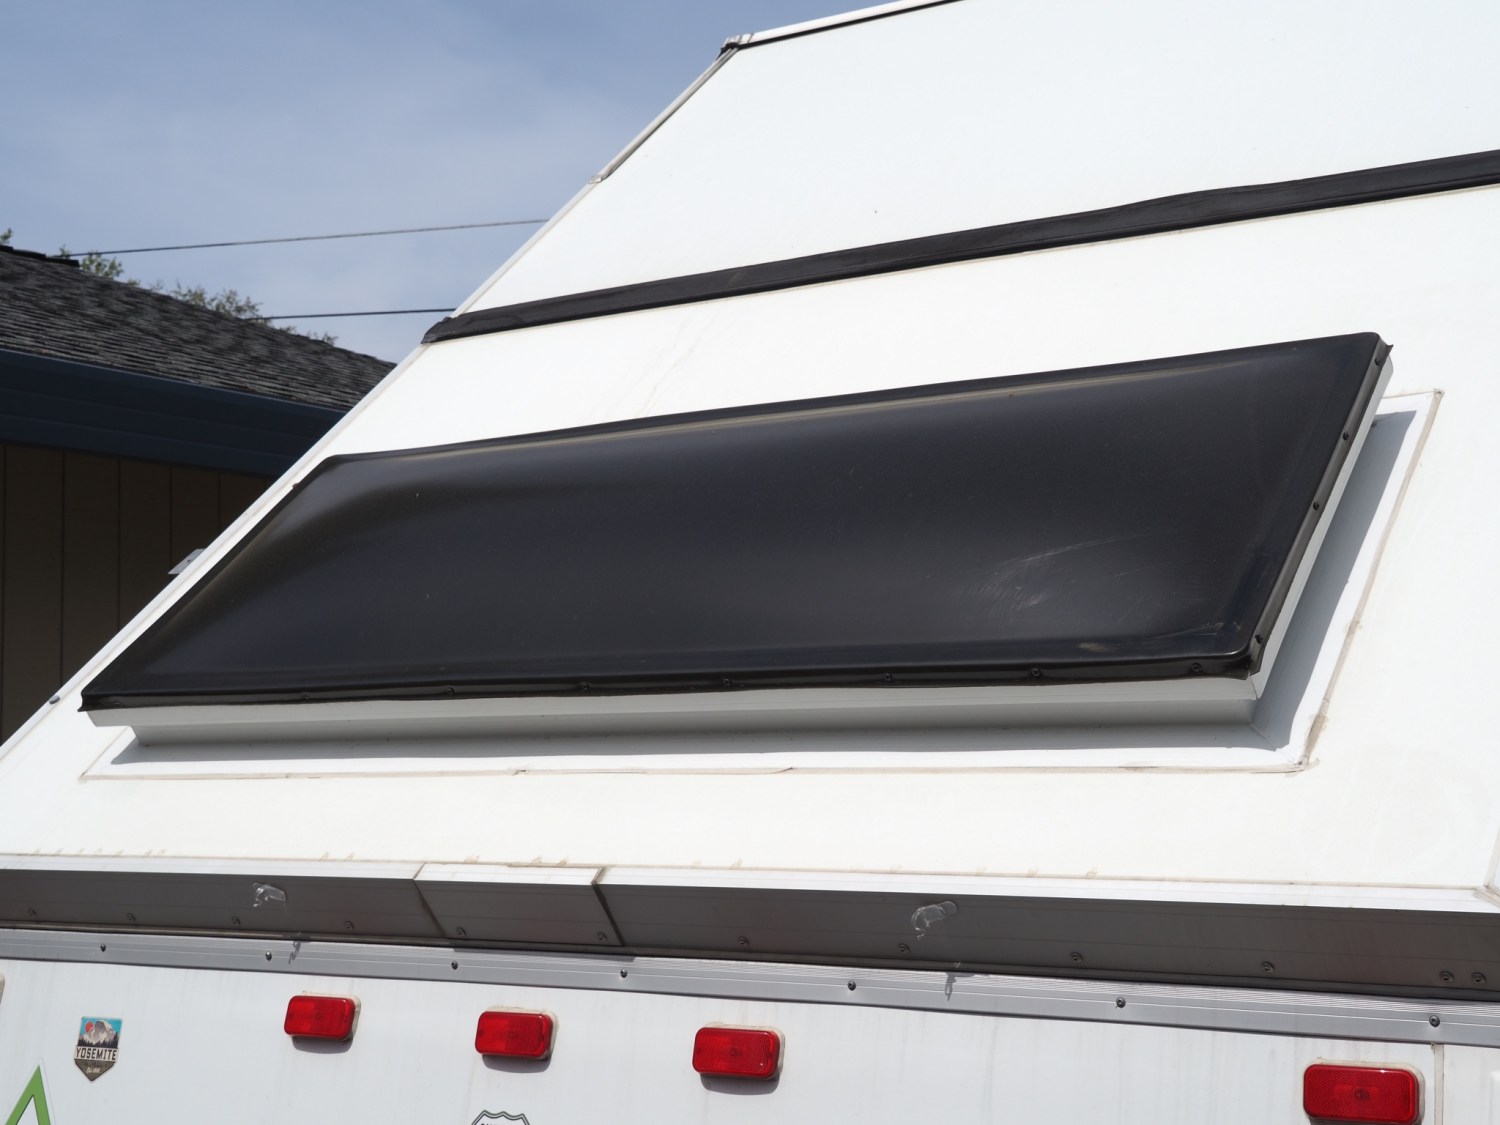
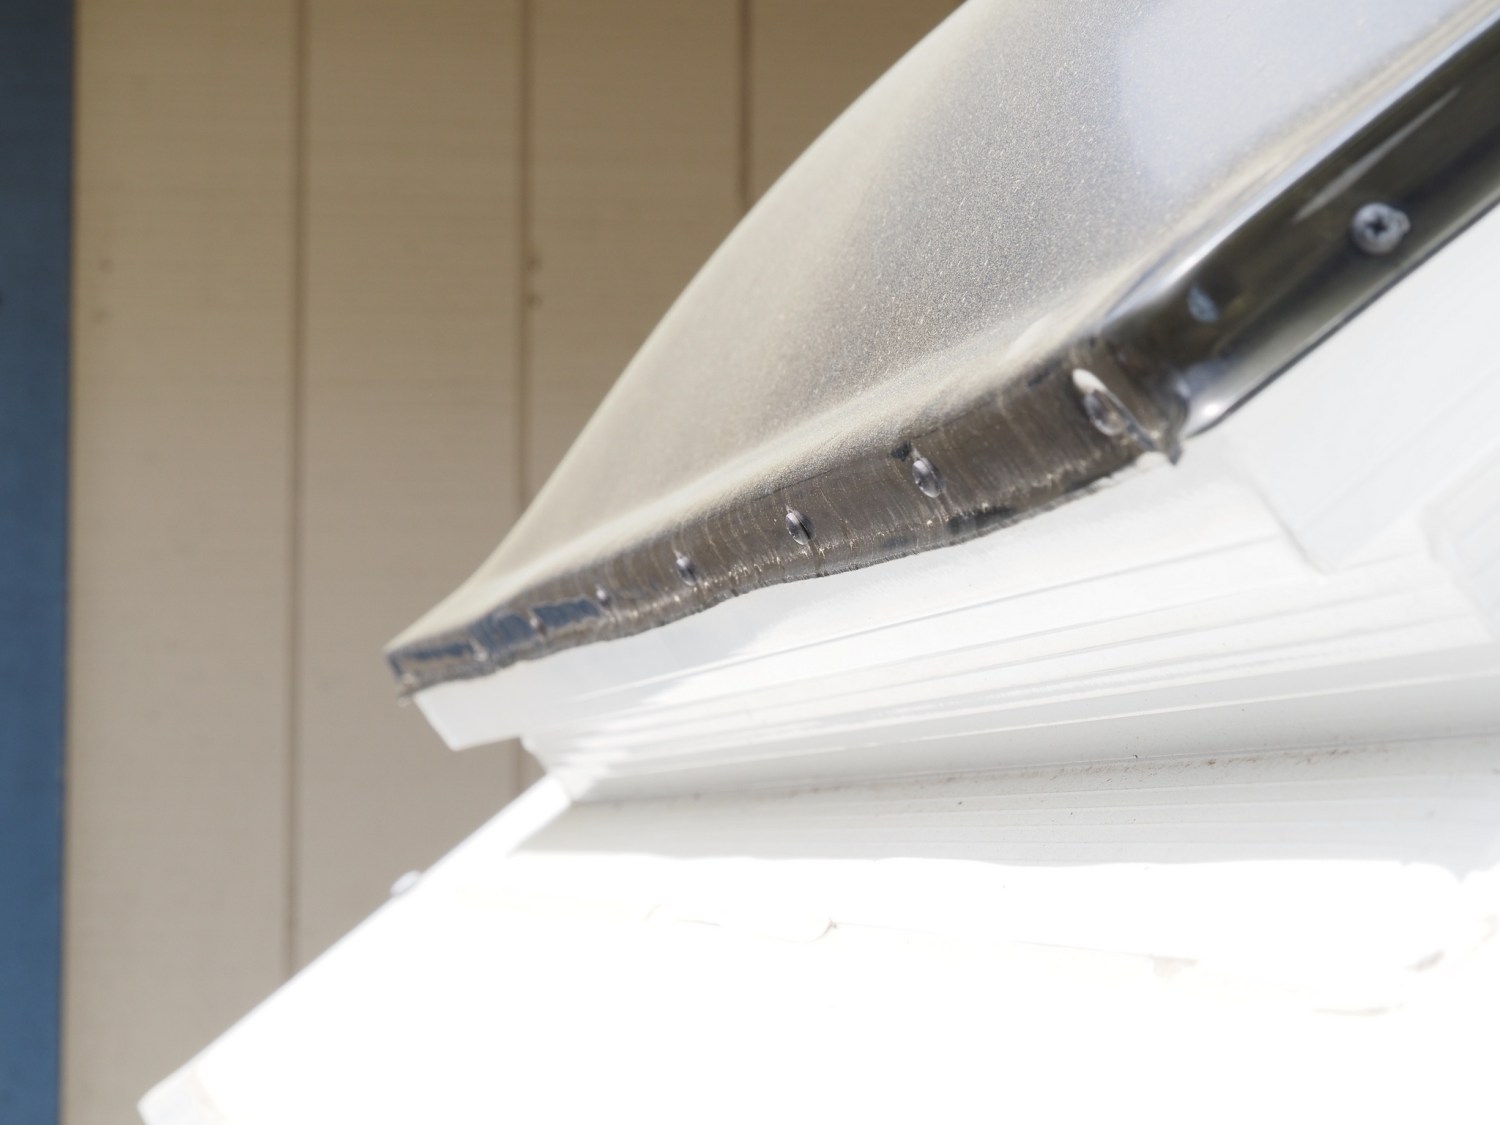
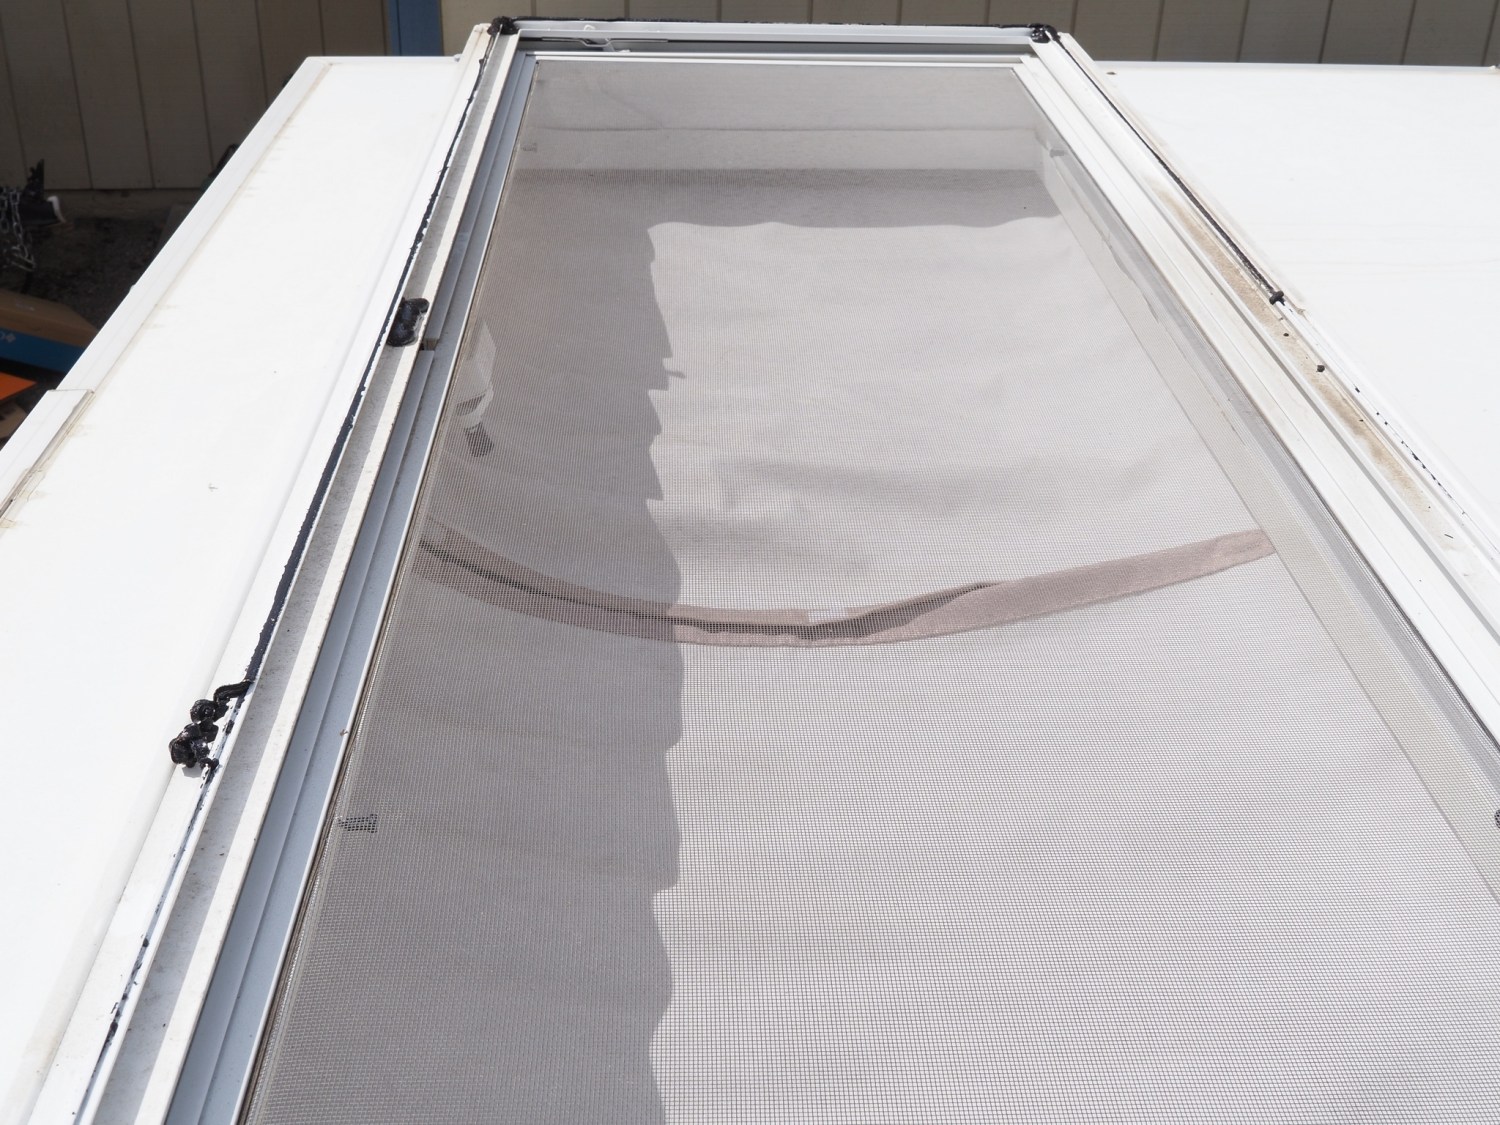
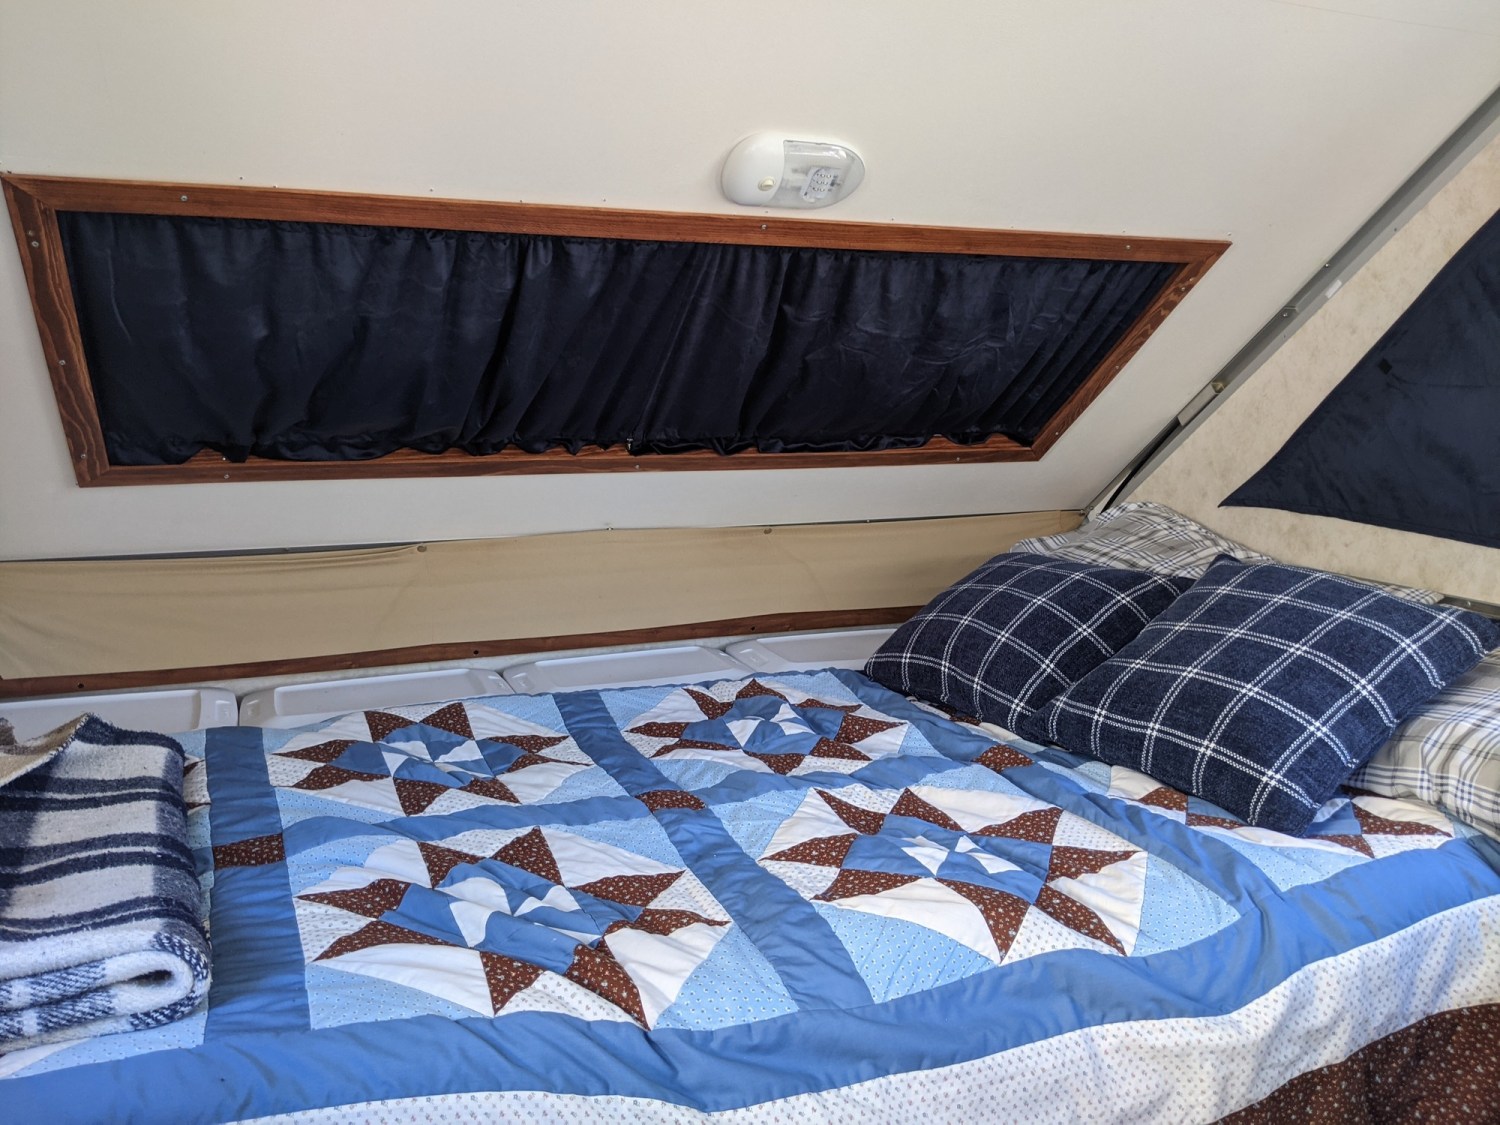
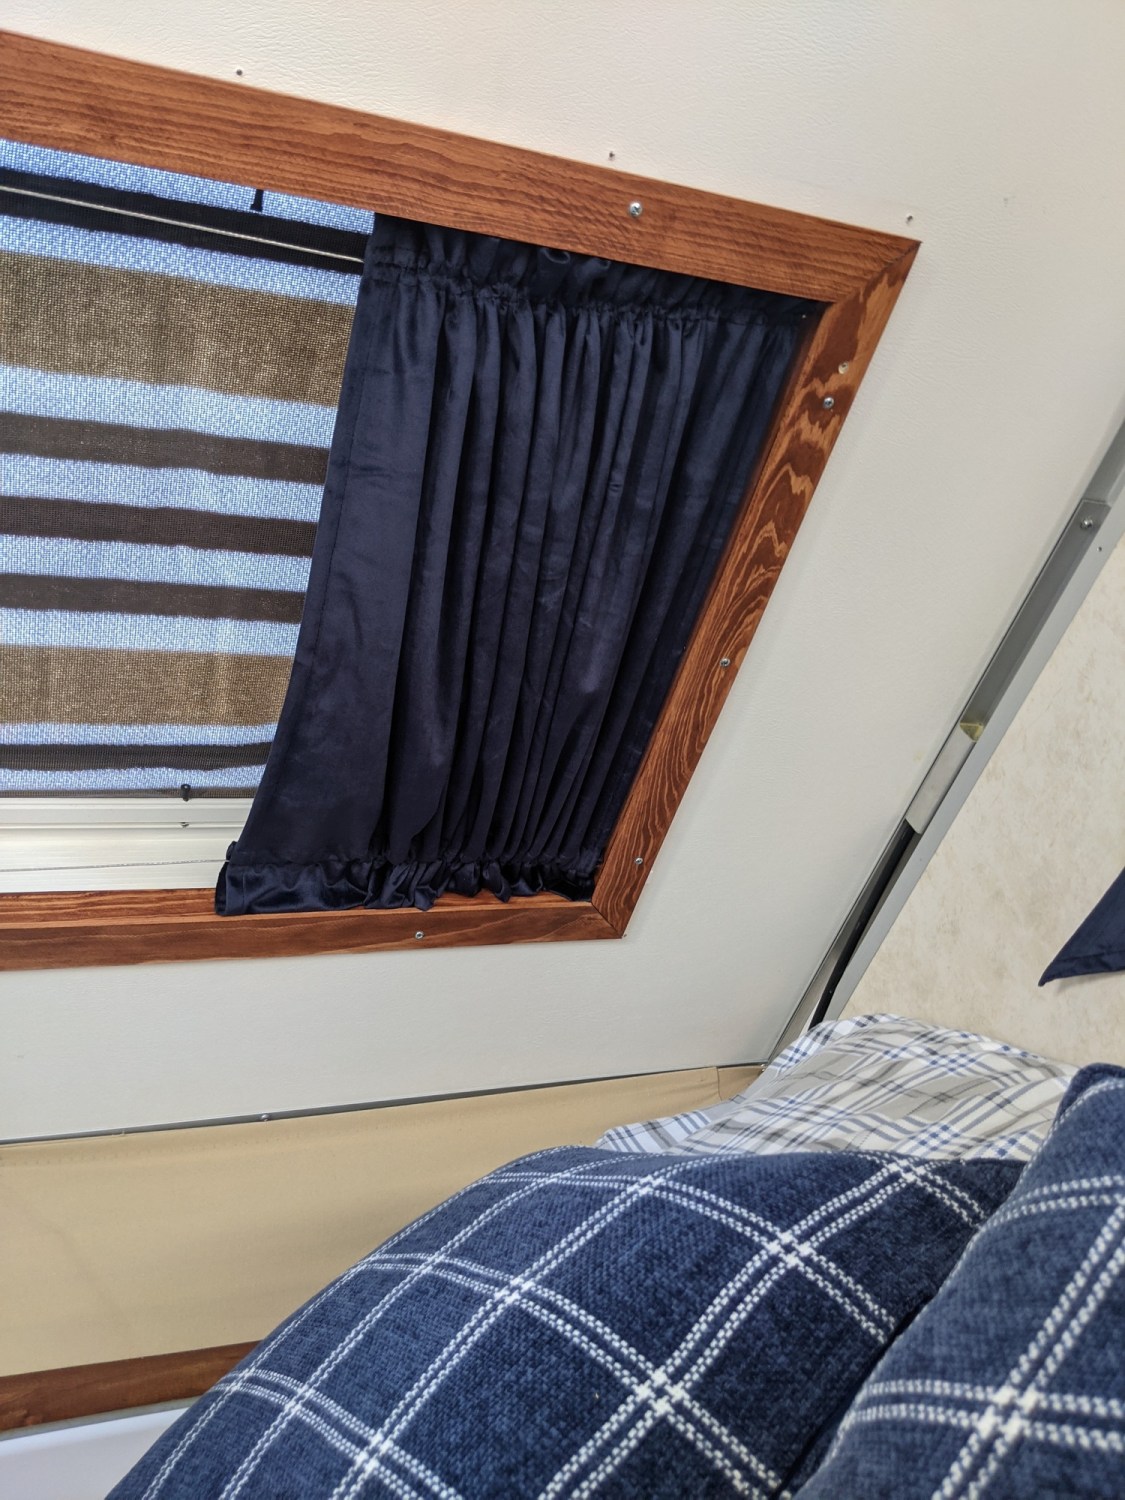
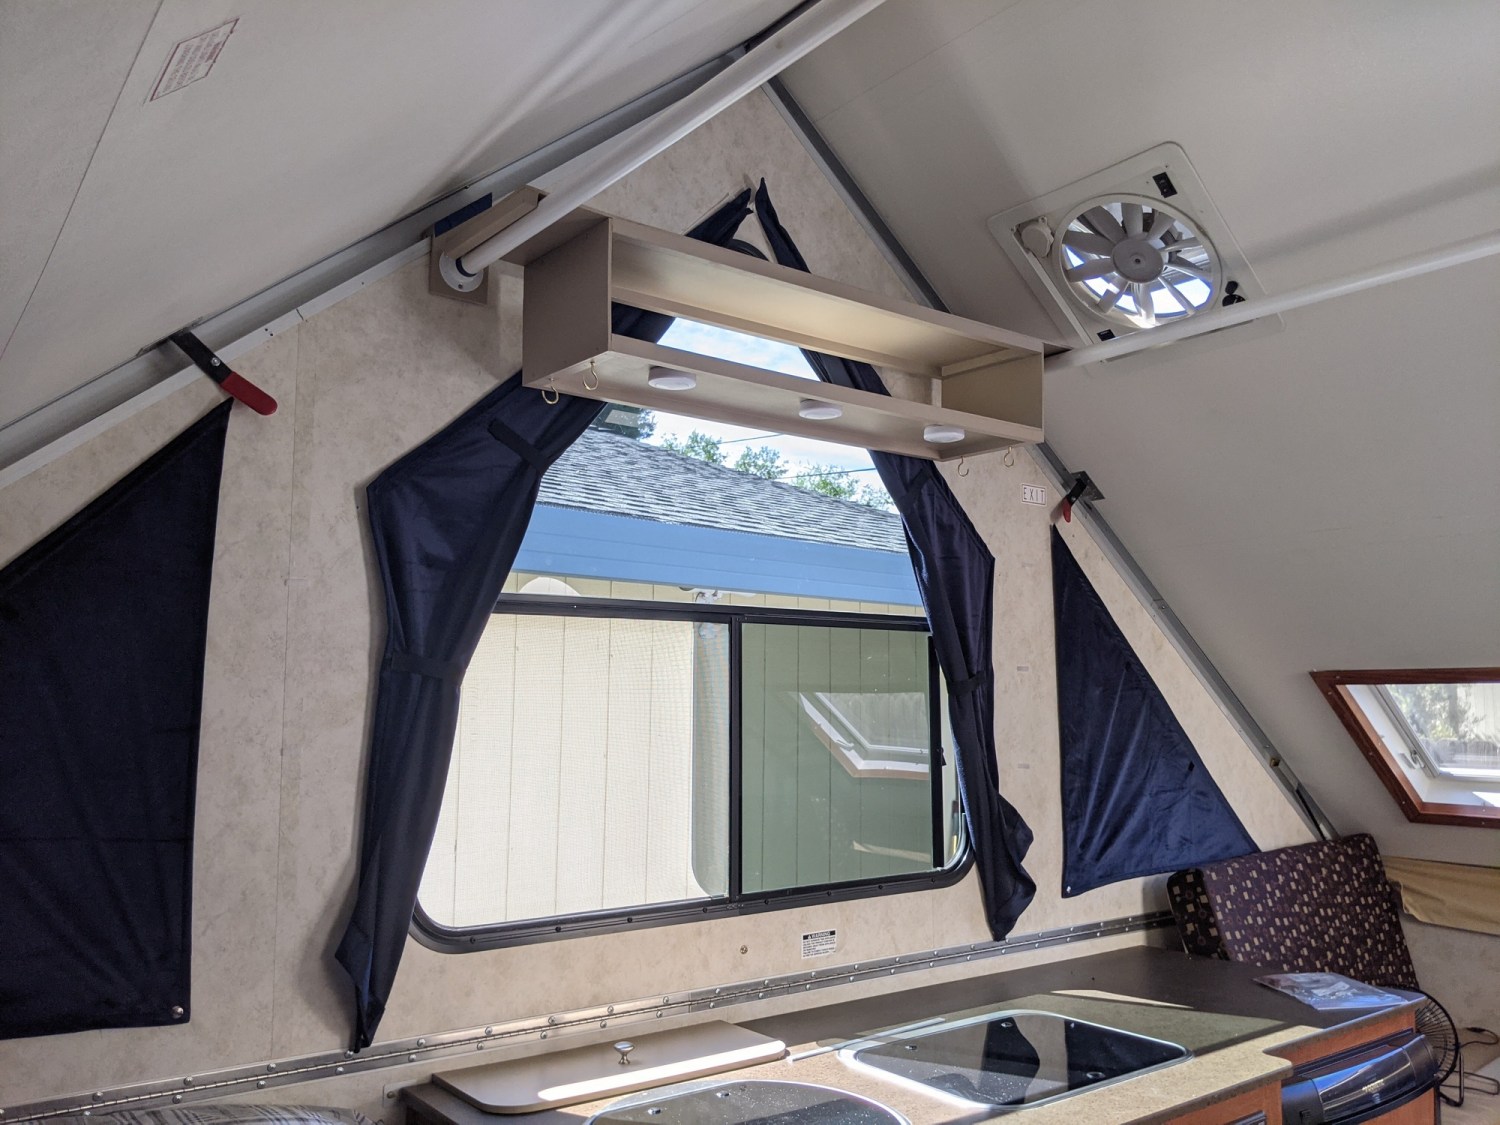
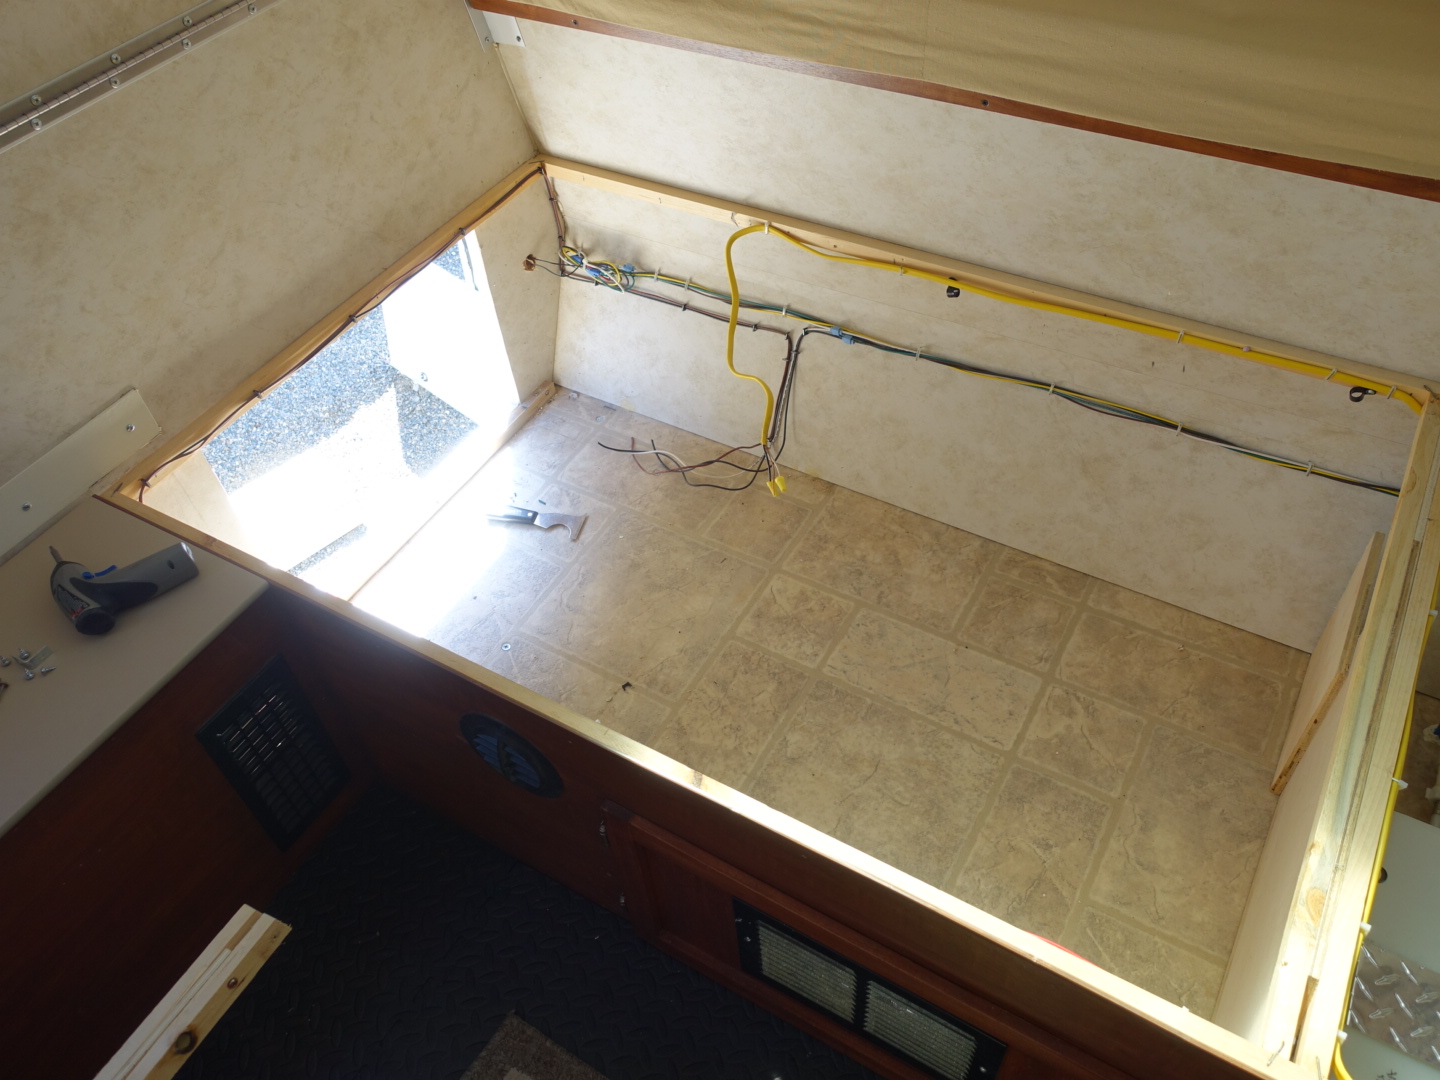
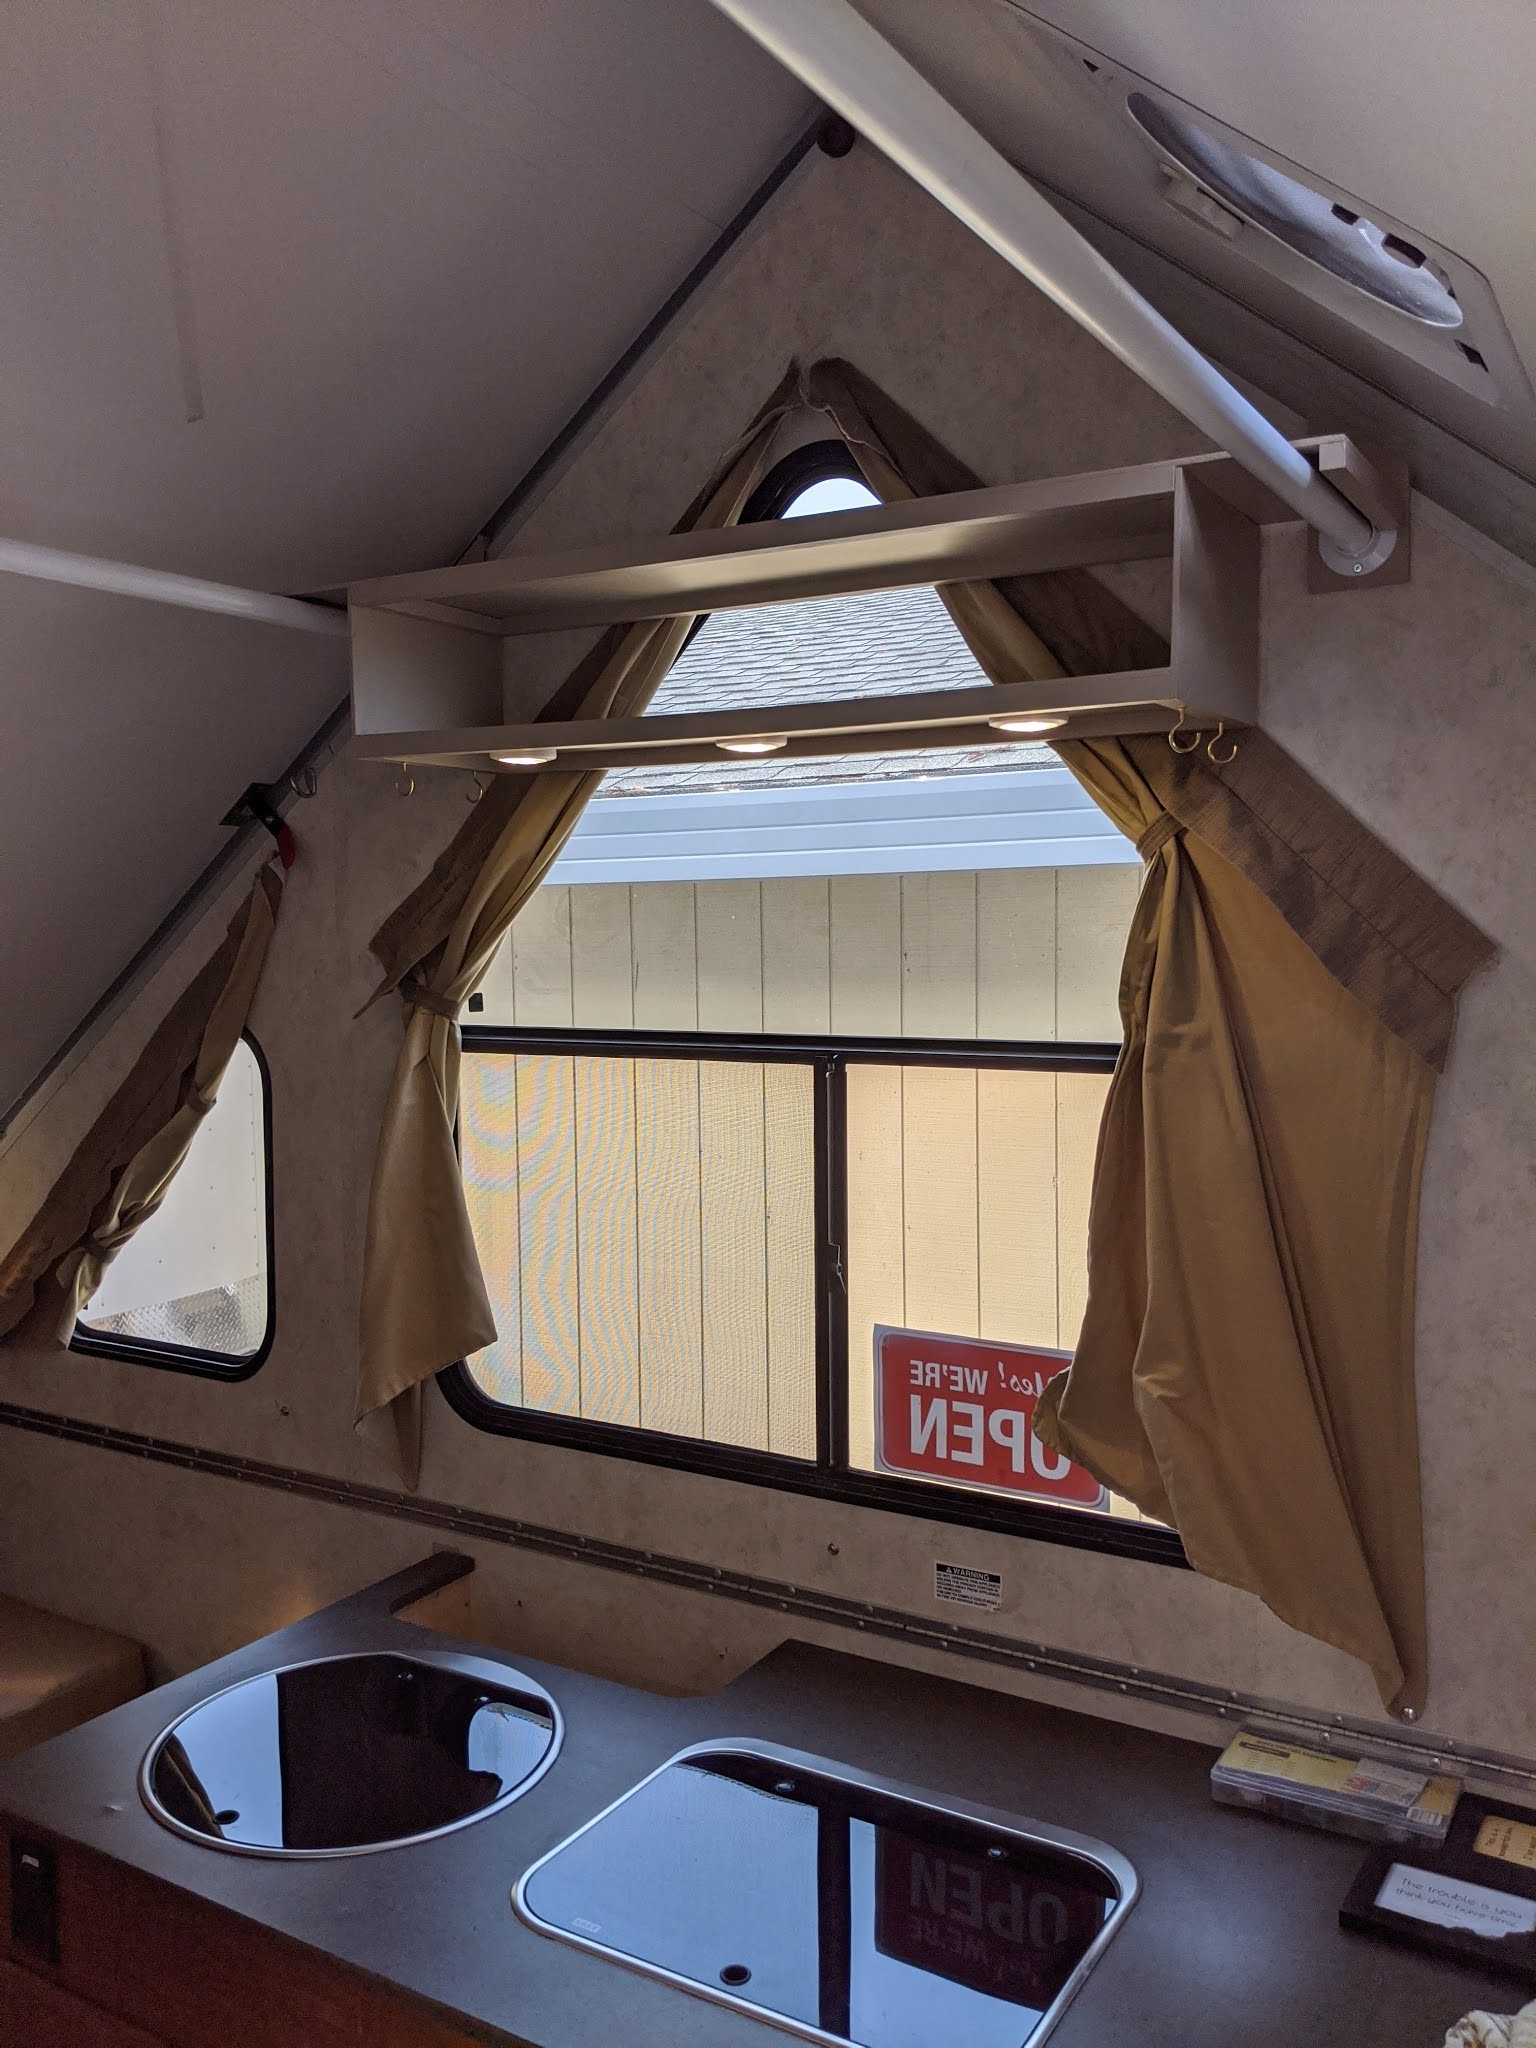
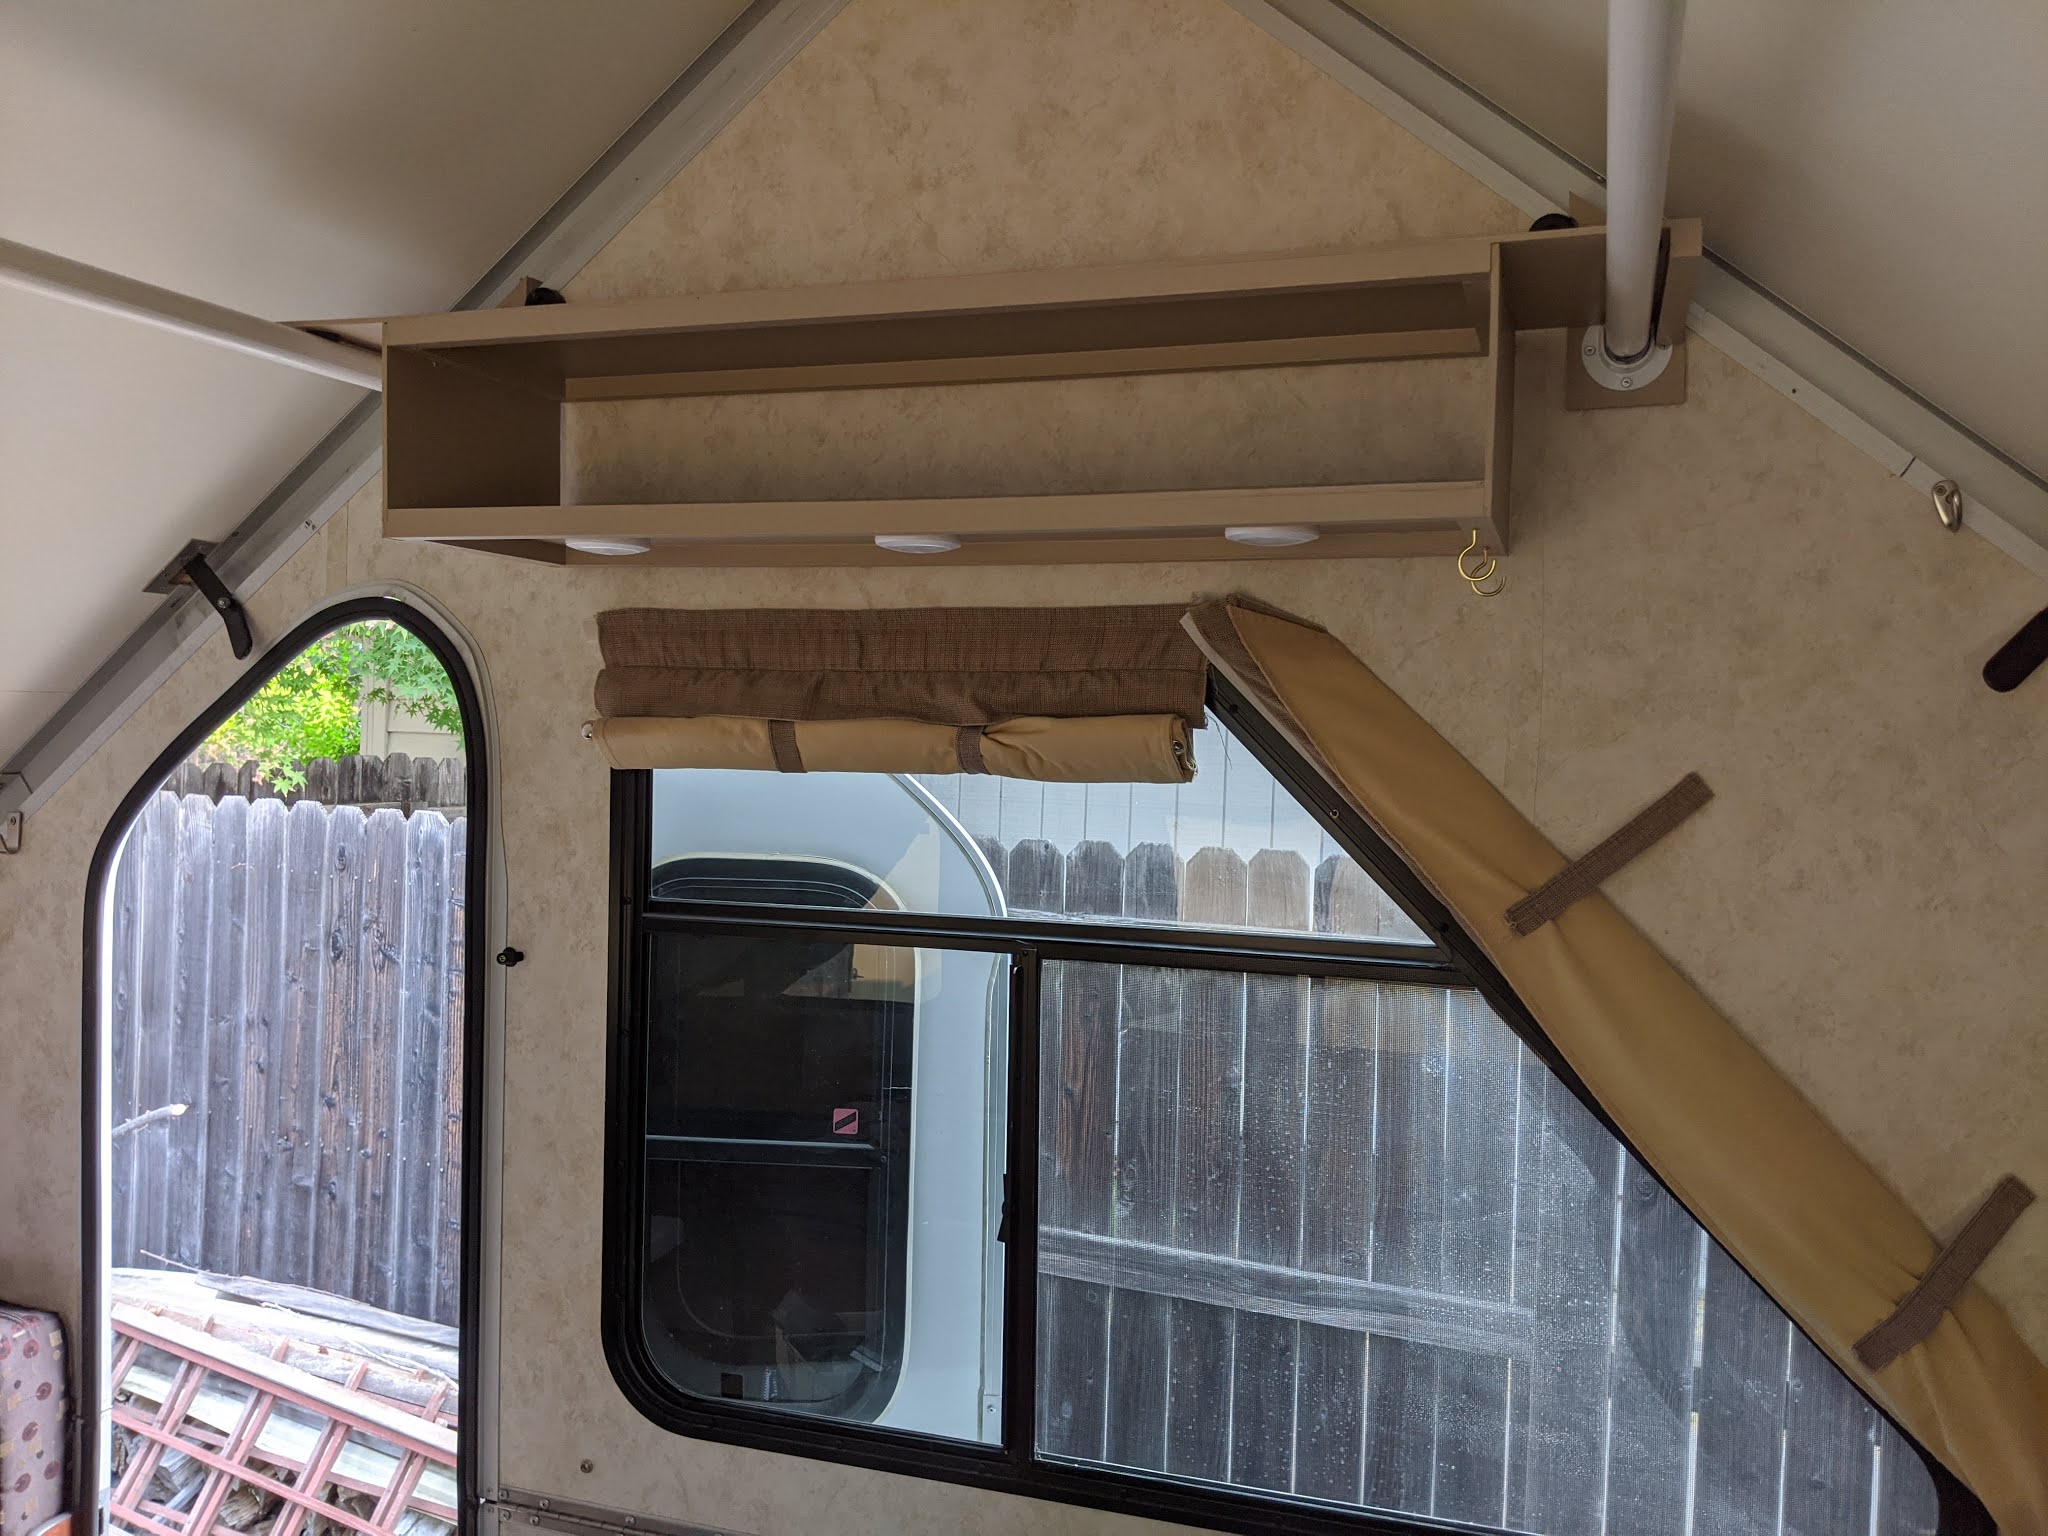
Thursday (May 27): Apparently, today is a good rain test of the new window installations. As I write this, a steady rain is filtering through the branches above me and pattering on the roof of my camper. As far as I can tell, the rain is staying on the outside. Fingers crossed.

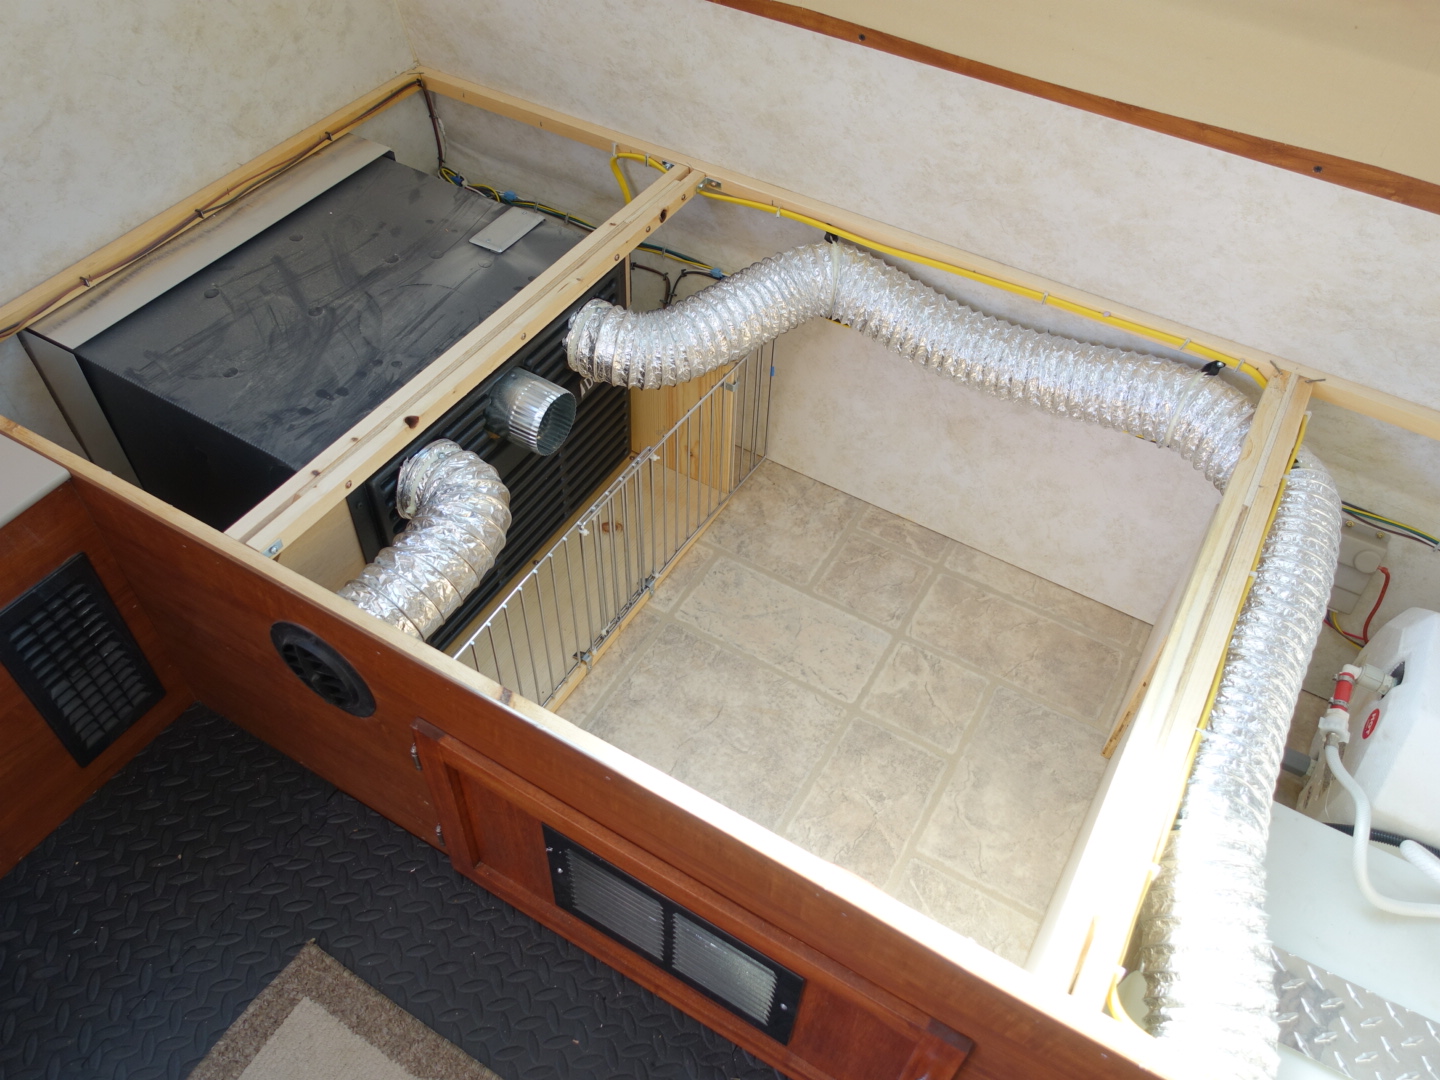
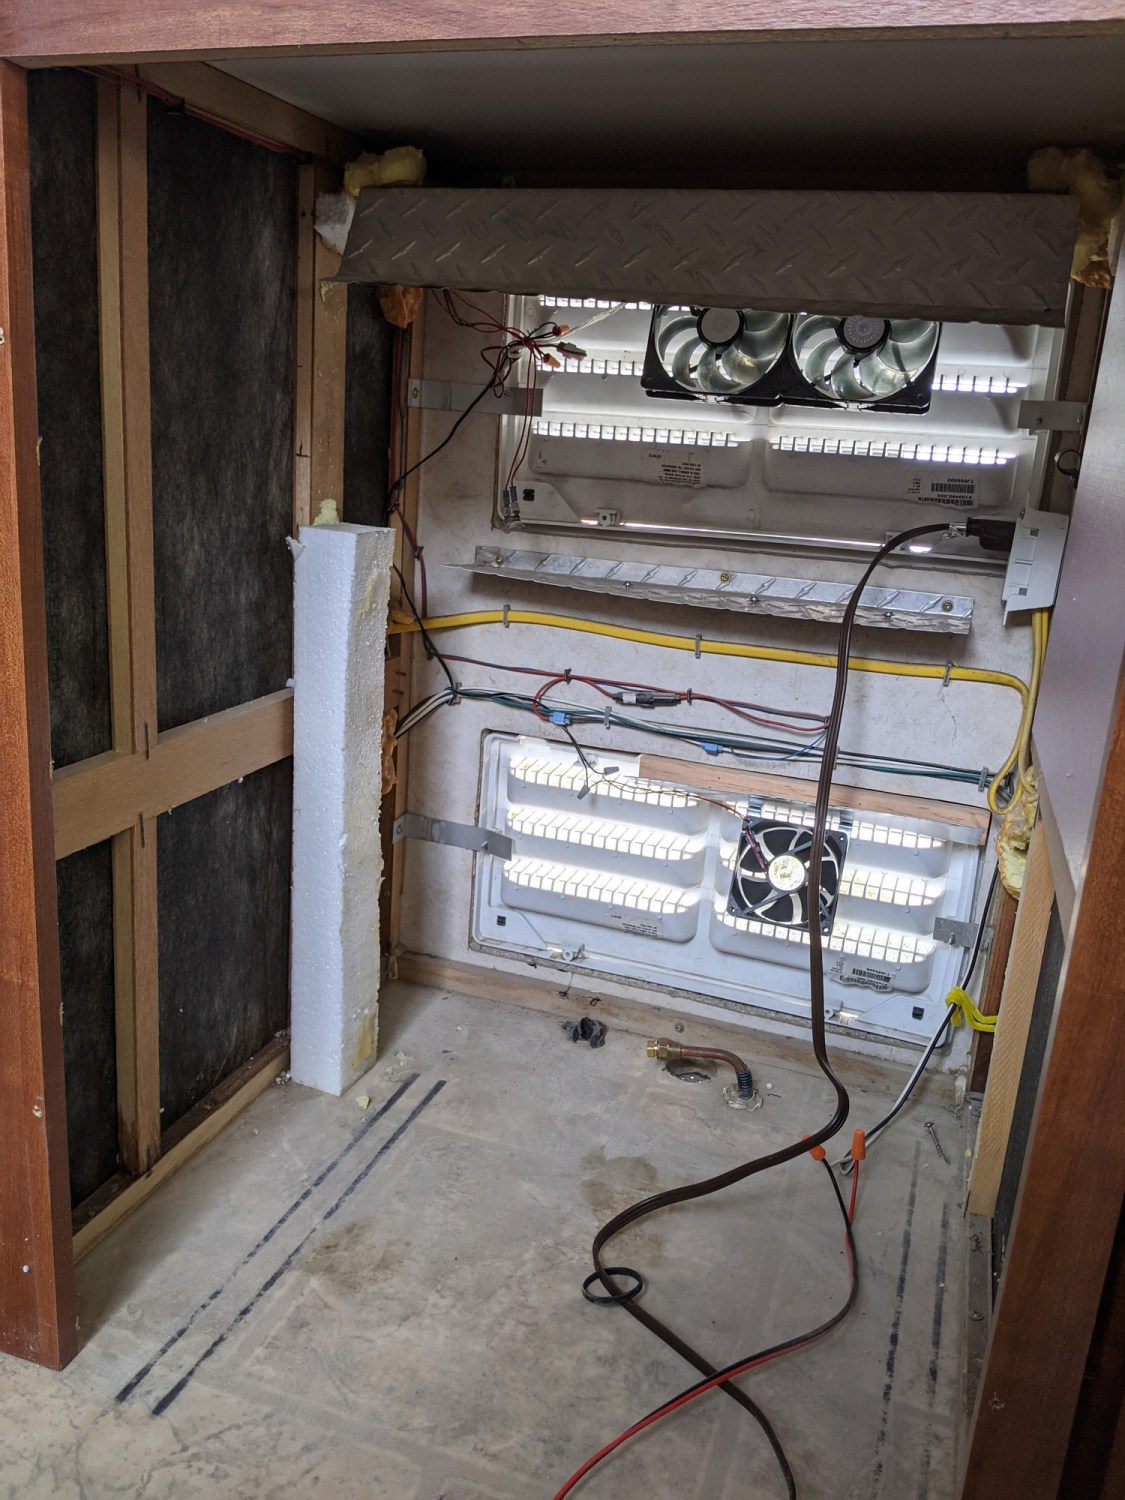
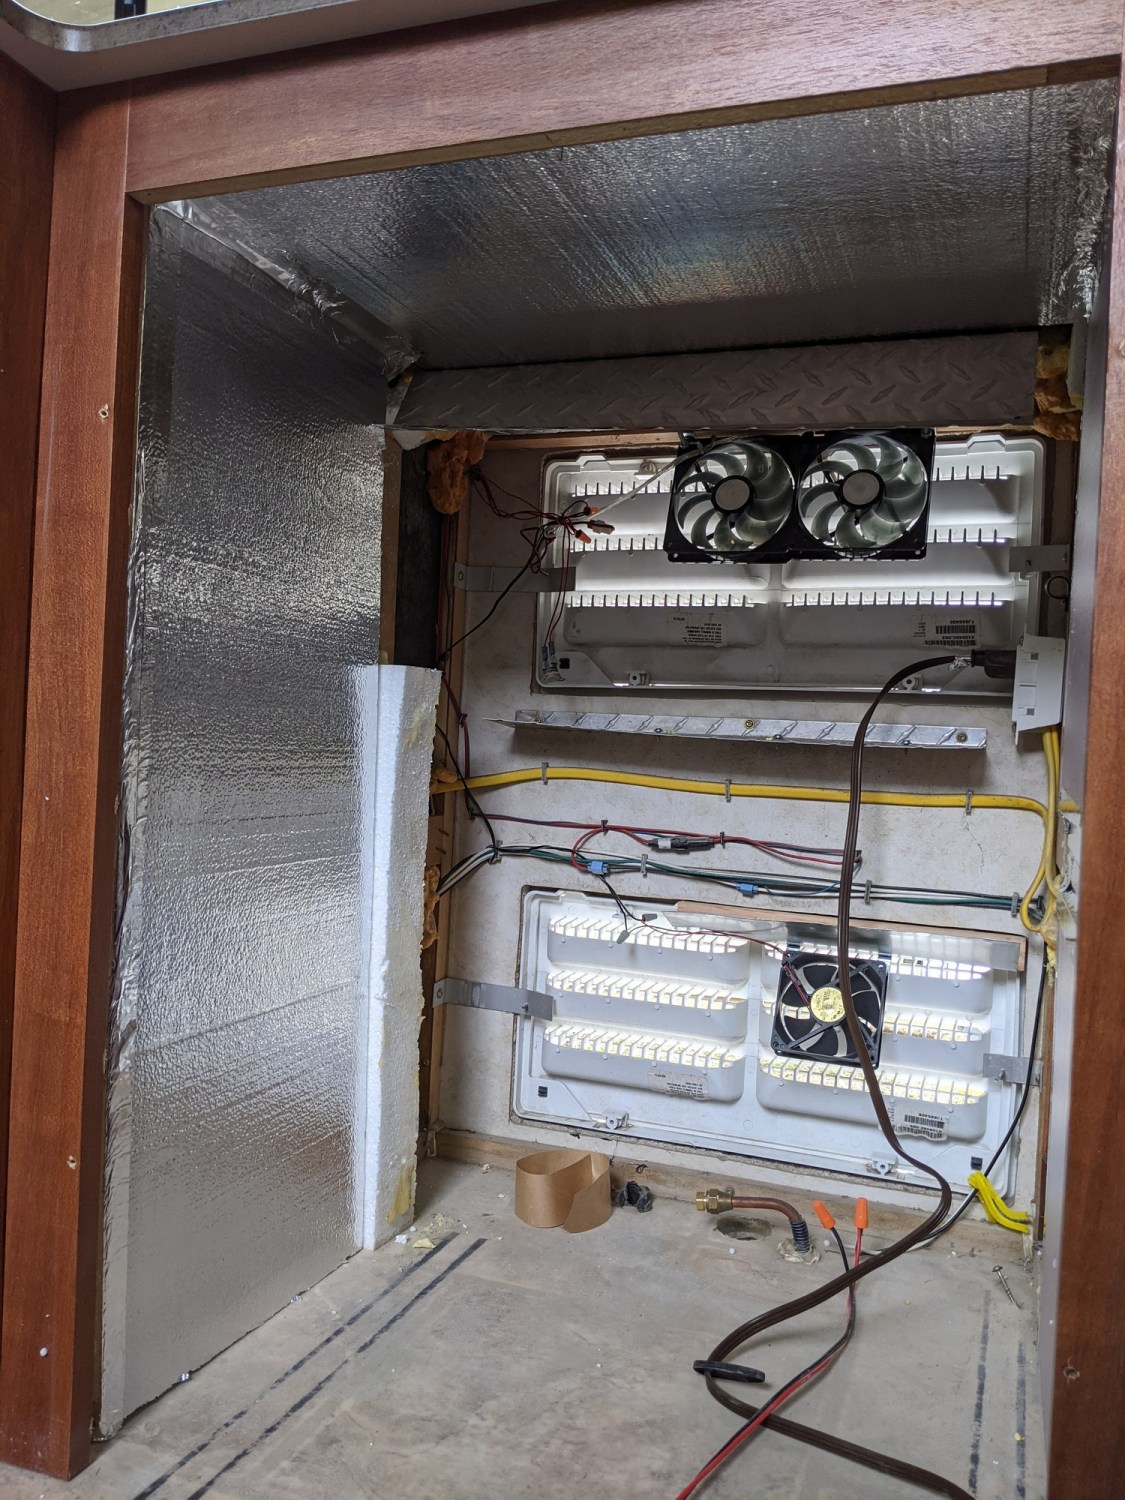
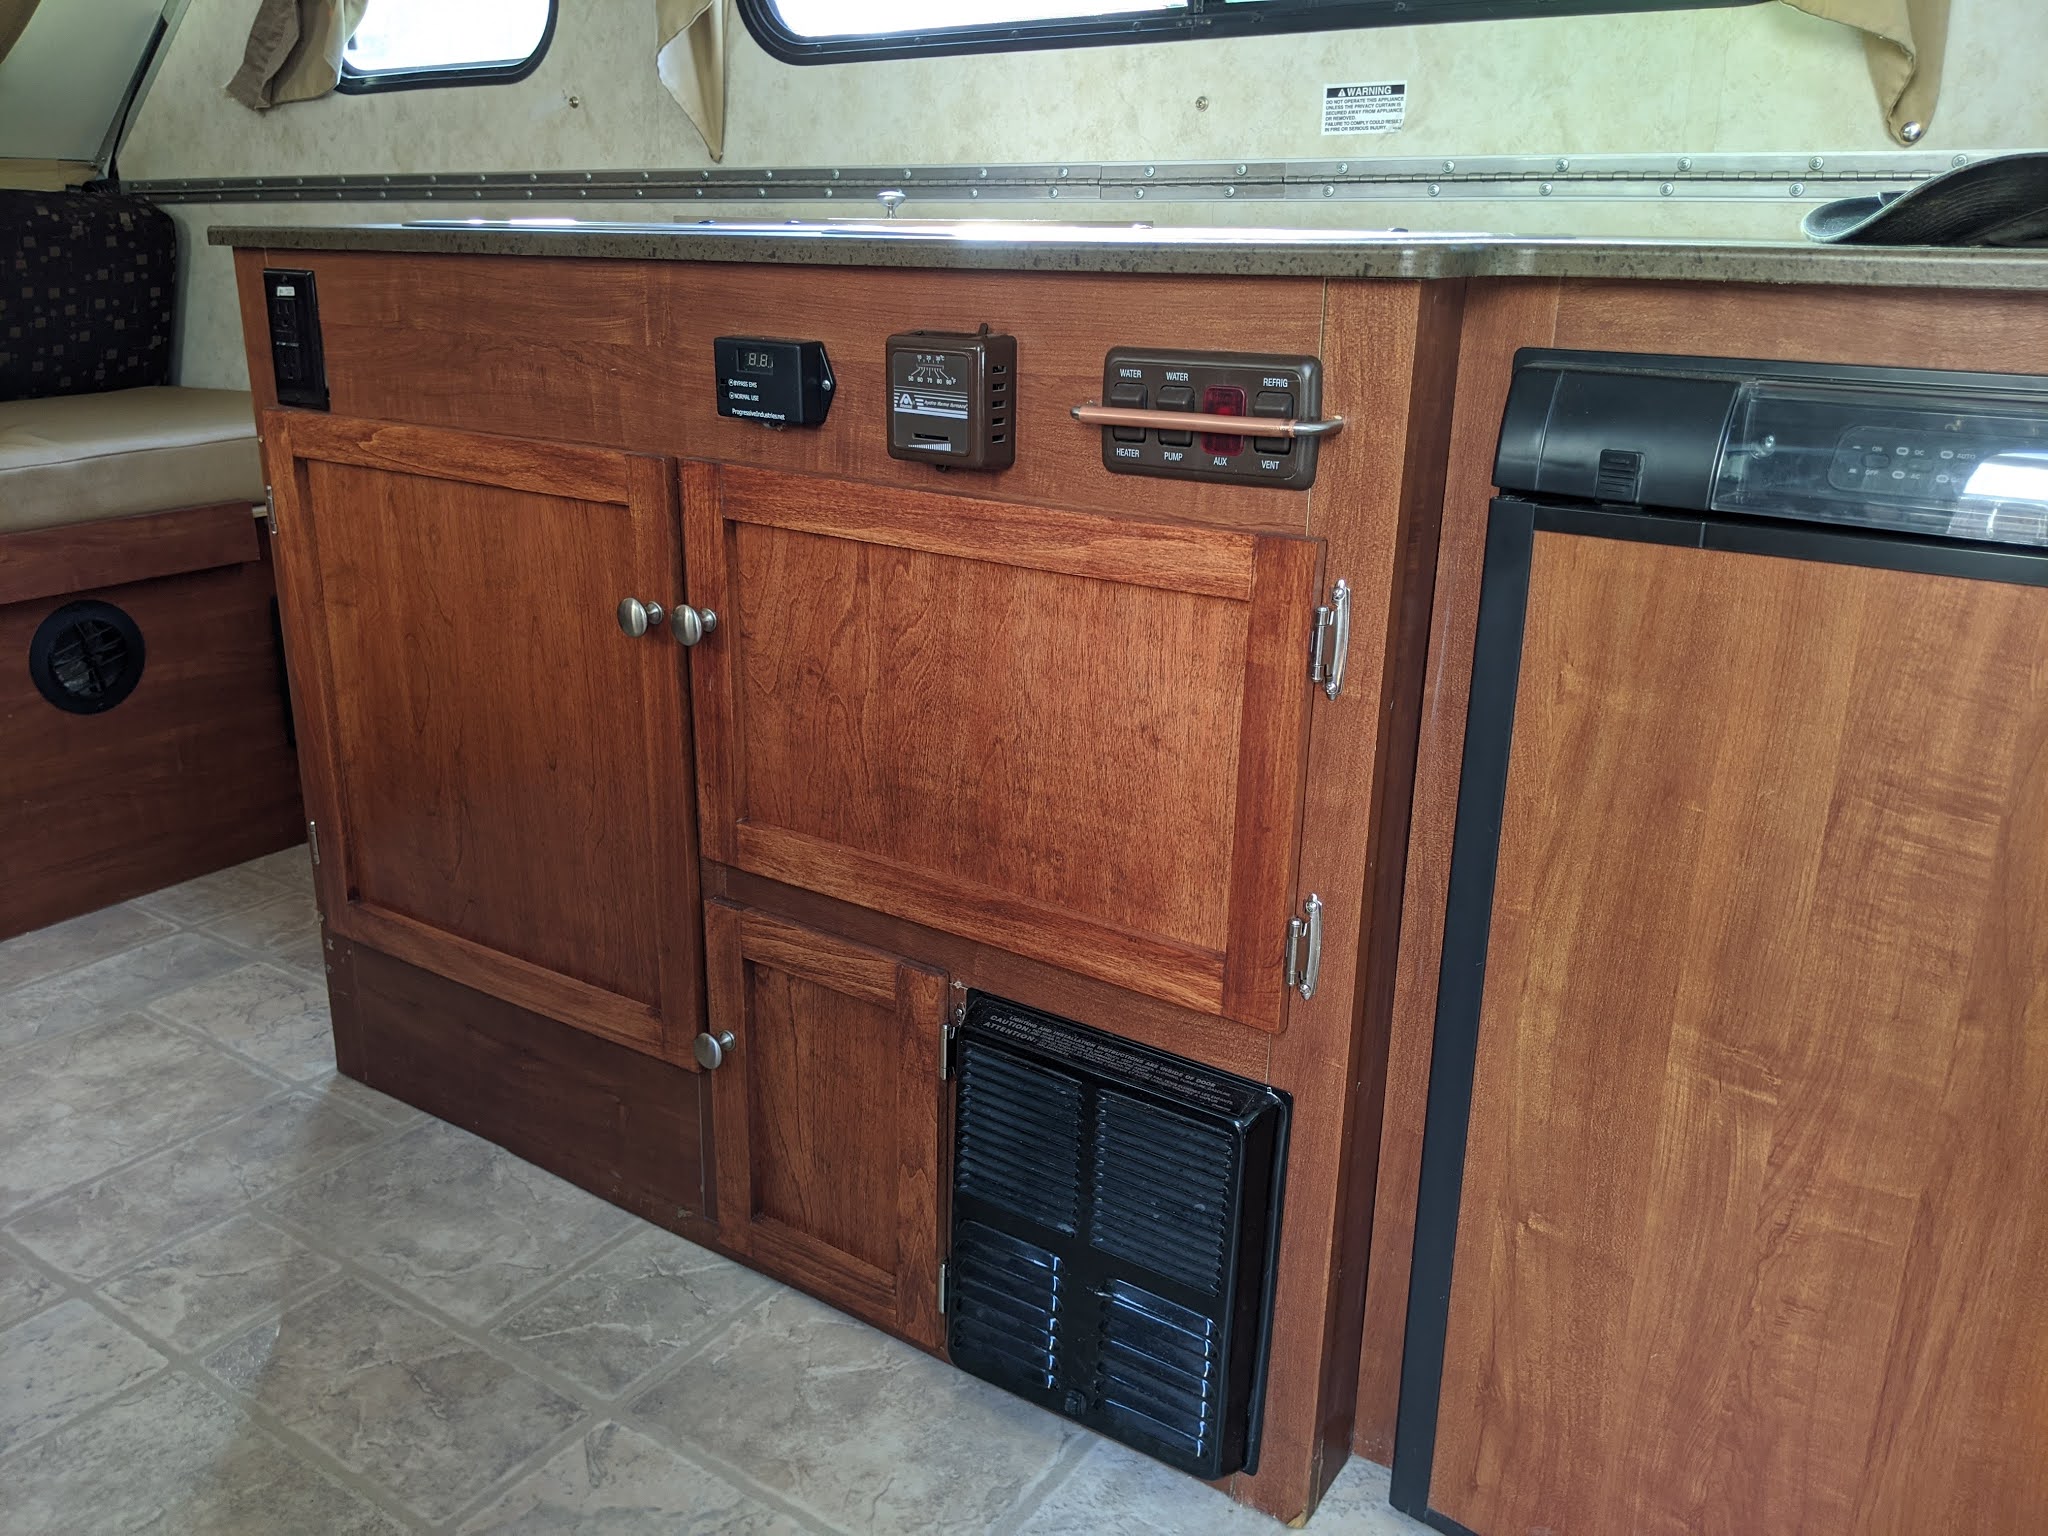
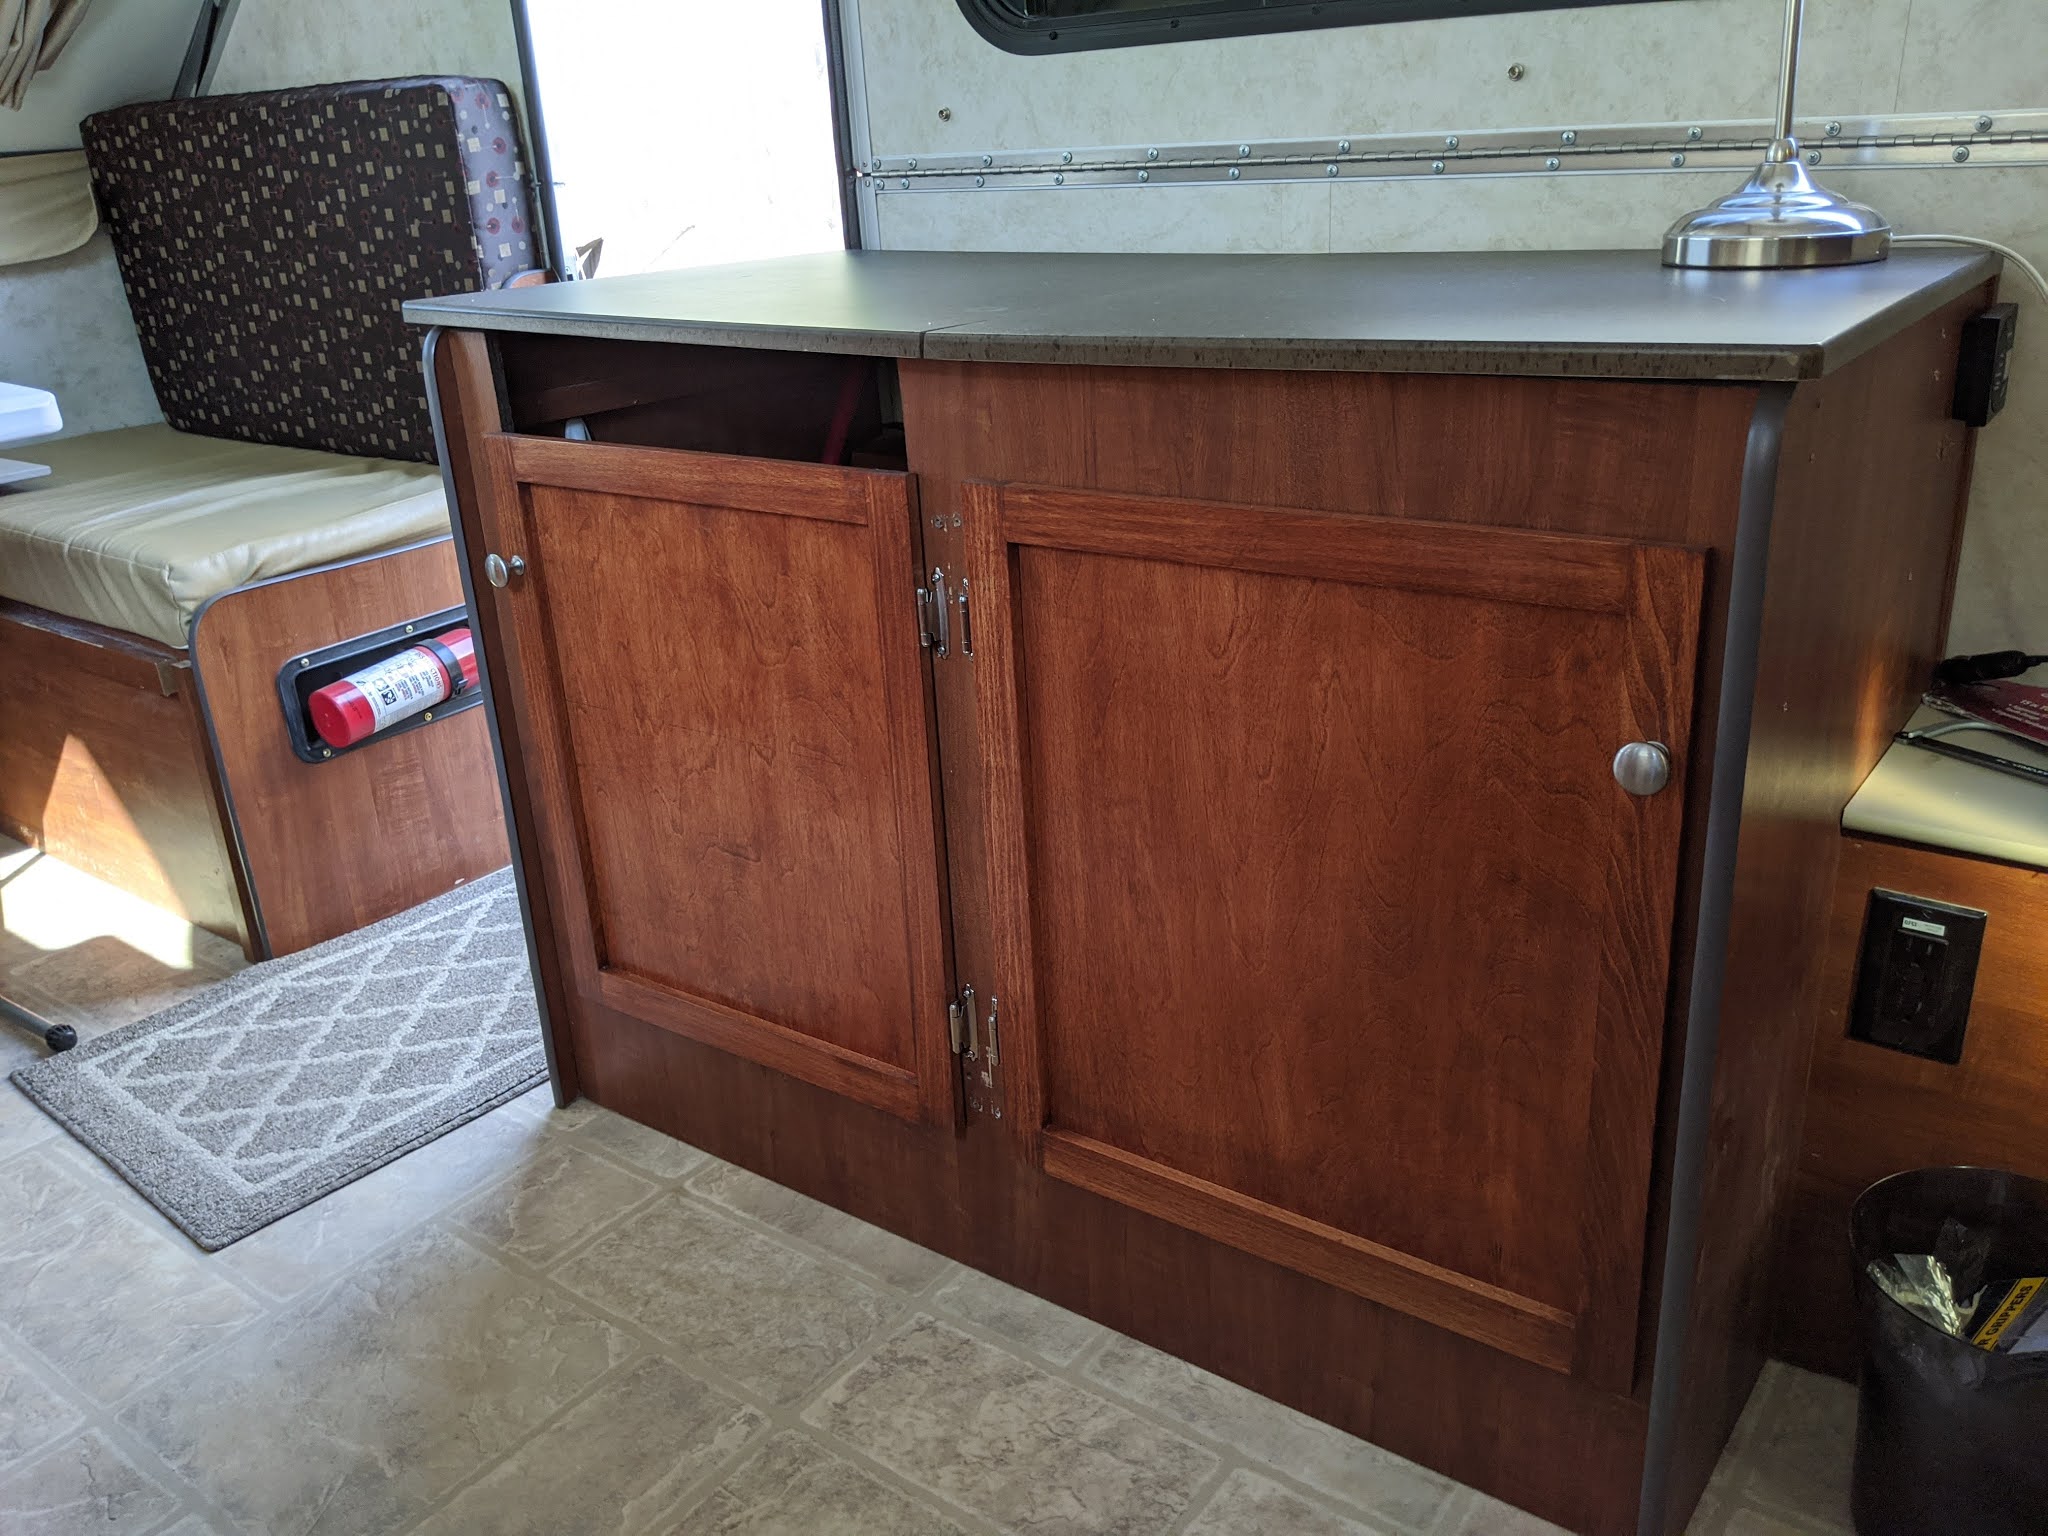
A different challenge has presented itself, though. While driving the first day, I had the refrigerator set to run on 12v DC to keep it cold. It worked, but when I had arrived at the Burlington campground, the trailer battery was at about 60% charge. I determined that the refrigerator consumed much more 12v power than I expected, which didn’t leave much for charging the battery on the drive.

When I drove from Burlington to Crescent City, I turned off the refrigerator and let it “coast” while driving. This worked OK, the temperature didn’t drop too much and the battery got a fair amount of charge while driving on the road. However, is still wasn’t a full charge, and my arrival time at the Smith campground was too late to use the solar panel to provide an extra charge. Even though I would be running the refrigerator on propane, it still requires 12v to operate the control panel and ignitor.

I monitored the battery level into the evening and as it approached 60%, I shut off the refrigerator again to “coast” overnight. This worked, but I had to restart the fridge and continue to use the battery power. With the rain today, I knew I would have no chance to recharge the battery with solar. So….McGyver to the rescue.

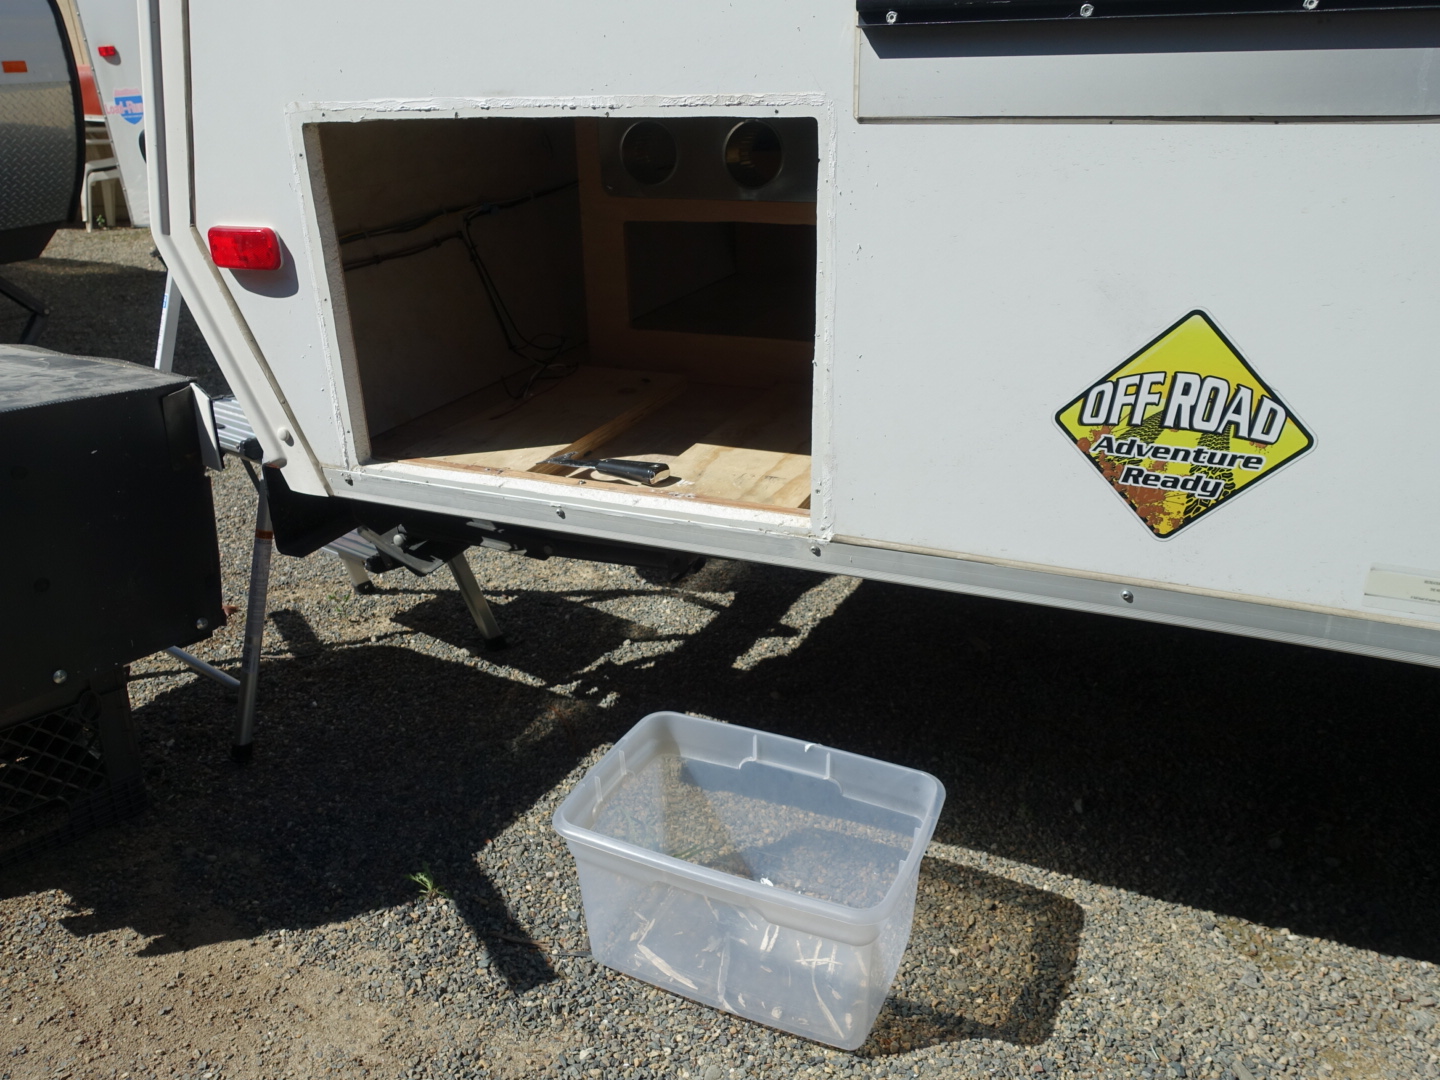
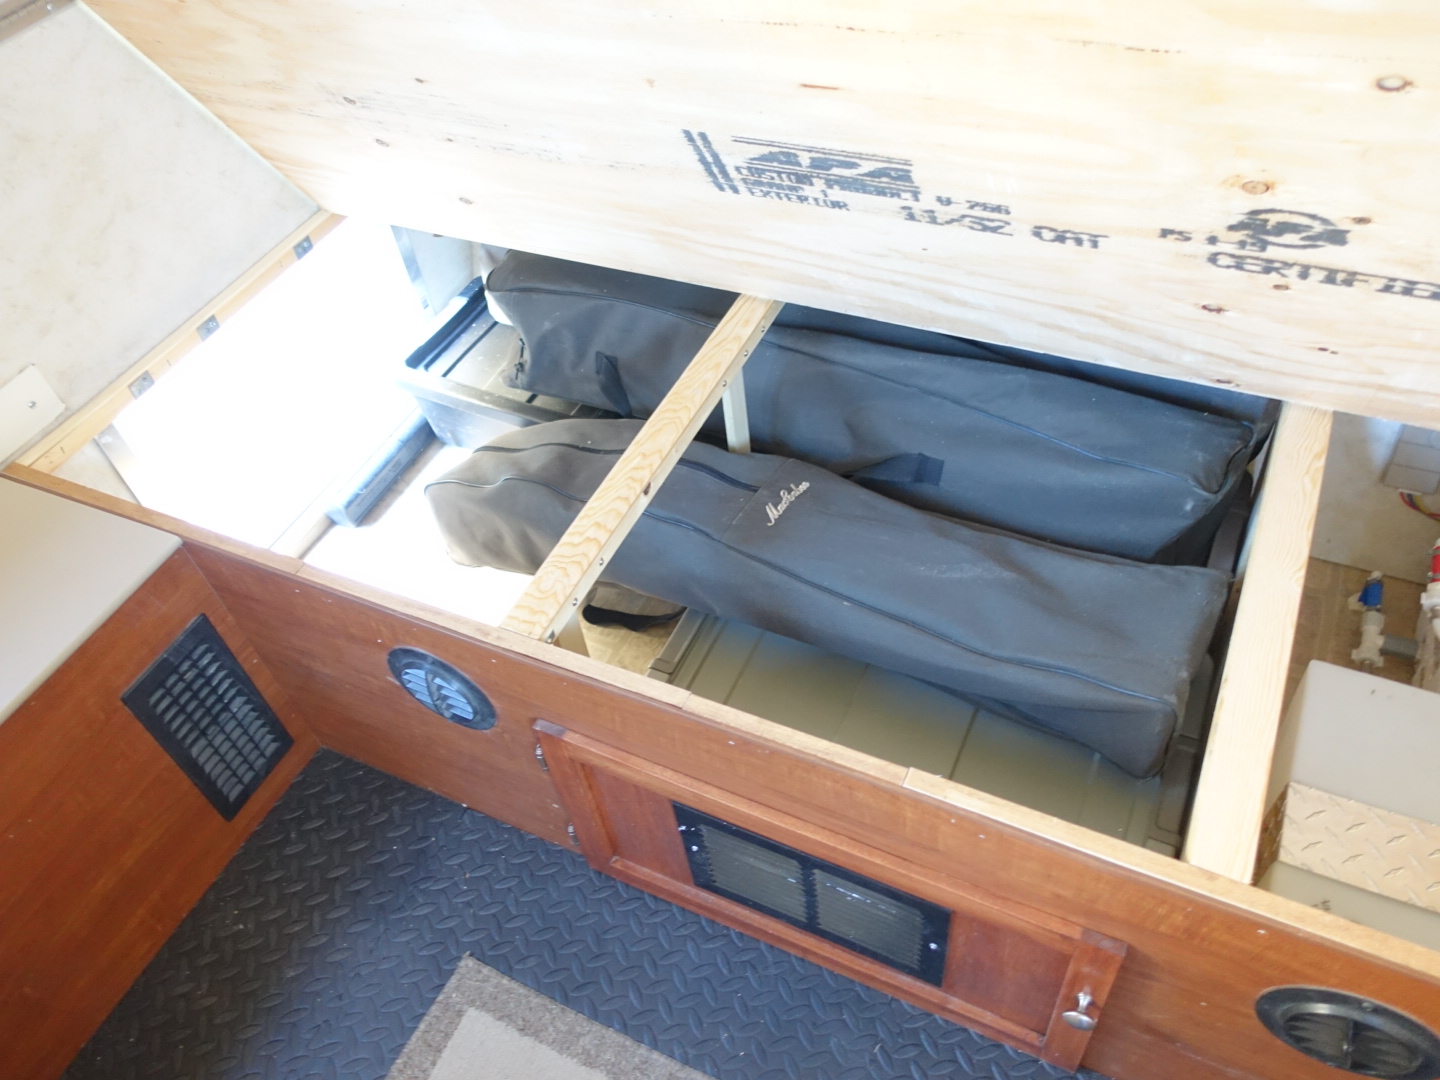
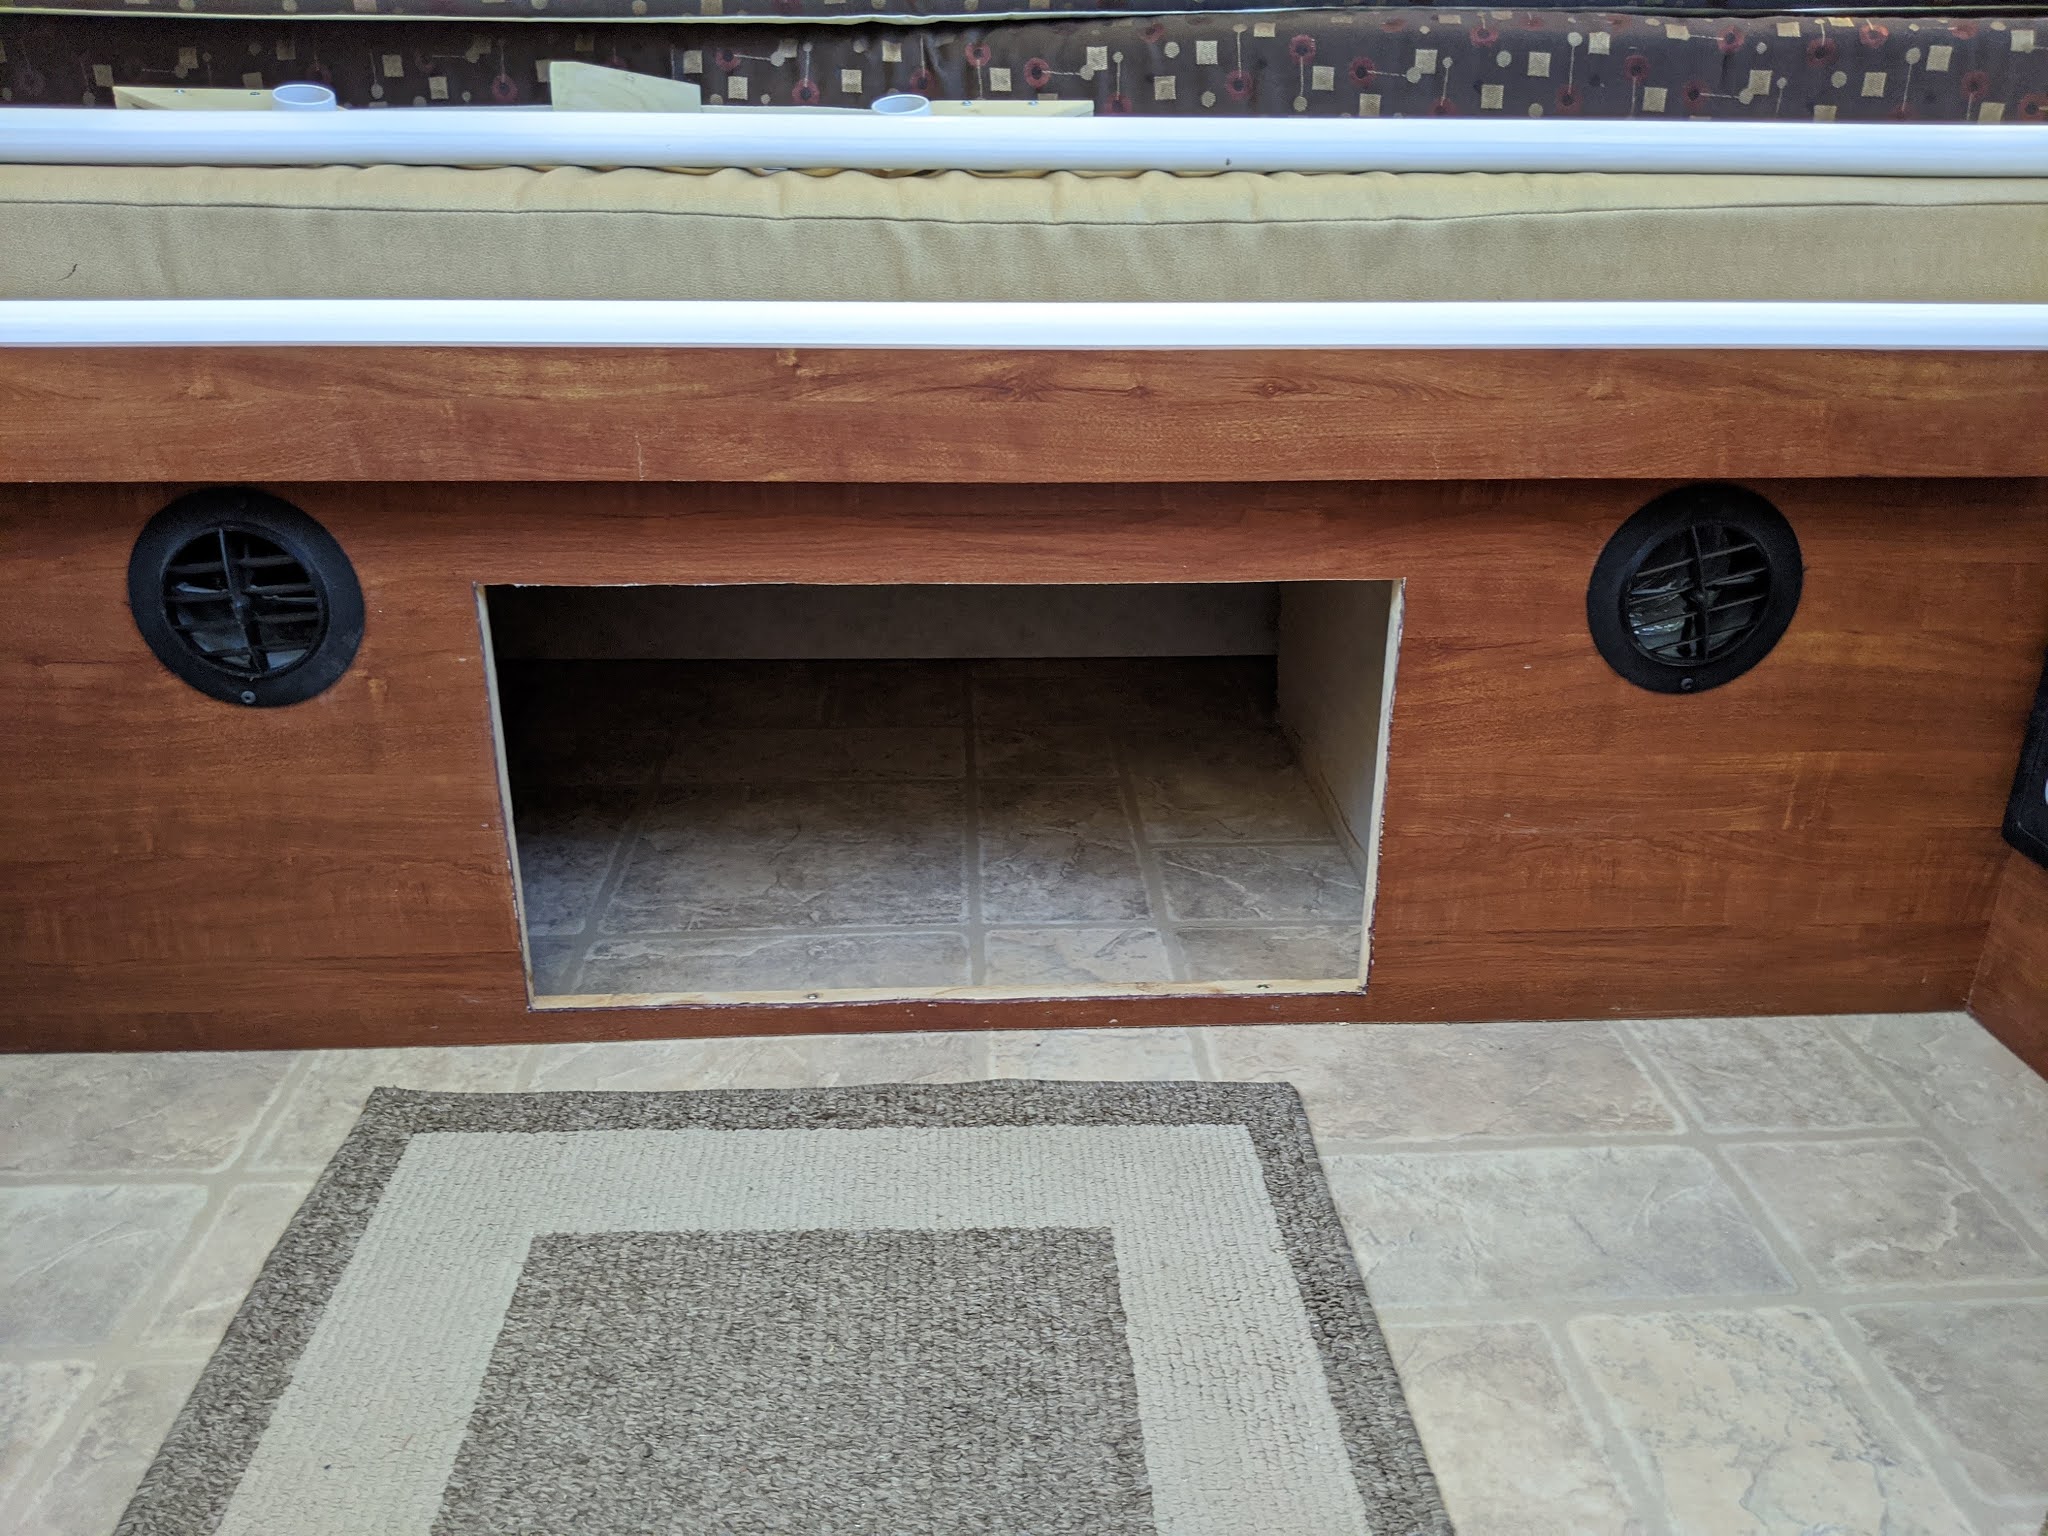
I did a bit of re-wiring to disconnect the refrigerator from the trailer battery and connect the refrigerator to a portable rechargeable 12v power station. This removed all usage from the trailer battery. I’ll continue to monitor this method and if all my power sources are drained, I can move the cold food to an ice chest until I’m able to recharge the batteries. No biggie. The lesson learned is that the refrigerator will work fine on 12V while driving, but the first night after a long day on the road should include hookups so I can recharge the batteries.

So, with a rainy day, what is there to do? I am sitting in a rain forest, so it seems like a perfect day to get out and take some photos!

– + –

Polycarbonate windows + new curtains

These old dome windows were dark, scuffed and not installed very well.

This trailer has unusual dome windows on the roof panels. Rather than the typical style, where the plexiglass dome windows are glued directly to the roof surface, my dome windows are mounted to a frame that opens, similar to a skylight or casement window. It’s a great option because it allows for additional ventilation.

It looked like someone in the past had replaced the plastic dome pieces with ones that almost fit, but not very well. The dome windows had rounded corners that did not fit well over the right-angle corners of the frame. By looking at the installation of the dome pieces, it was obvious that this had been hacked. I researched replacements, and found no options for direct replacements. I knew I would have to make my own.

The corners were cracking, due to the mismatched corner shapes.
Not a good installation job
The dome pieces were easy to remove. They are about 2′ x 5′ in size.

I decided to replace the dome pieces with pieces of flat, 1/4″ tinted polycarbonate. TAP Plastics was able to cut two pieces for me at the exact dimensions I needed. I cleaned up the frames to prepare them for the adhesive. I used E6800 adhesive – it’s permanent, waterproof and has UV protection.

With the dome piece removed, I had access to the frame to prep it for the adhesive
In order to pre-position the polycarbonate panel, I created this suspension frame to hold the panel directly above the adhesive. (The protective sheet on the underside was removed.) I did not want to move the panel once I set it down on adhesive. I removed one of the long supporting strips of wood and carefully placed the panel down on the adhesive, then lowered the other end. This method worked out well.
Once the polycarbonate panel was in place, I added some weight to the edges to help the adhesive seal over night.
I did both windows at the same time.

After letting the adhesive set up for 24 hours, I made frame pieces from 1 1/4″ aluminum angle stock. I used the same adhesive to attach the aluminum frame as well as some stainless steel screws around the edges. I then used silicone caulk to seal all the edges.

The finished window
The windows open to provide ventilation.

After replacing the windows, I wanted to also clean up the inside of the window area. The old trim piece was plastic that had cracked over the years. The curtains were difficult to open and close.

These curtains were difficult to open and close, and did not block out much of the light at night.
The plastic trim around the inside of the window frame was brittle.

I decided to build new inside frames out of wood and make new curtains. The curtain project took on a life of its own, since I made curtains for every window in the trailer. This was a total of 11 curtain panels. I bought 100% blackout curtain panels and used them as raw materials.

The finished curtains and wooden frames
The curtains open and close on suspended cable
I sewed new curtains for all the windows in the trailer.
For comparison, these are the old curtains

I was happy with all parts of this project. The old dome windows needed to go and I’ve been wanting to put a different color scheme on the inside of the trailer.

Now I’m ready to travel!

– + –

Heat pump extraction

This was a major project I’ve been wanting to tackle. My trailer had a Dometic Coolcat heat pump installed under the rear bed. This unit is a combination air conditioner and heater. It weighs about 75 lbs. By design, the heater component does not provide heat once the outside temperature drops below 35° or so.

The heat pump has an external ventilation grill and the air movement inside the trailer was ducted. I wanted to remove the heat pump and make use of the space for storage. I’m not a big user of air conditioning and the trailer also has a propane furnace that I can use when it gets cold.

The grill is the external part of the heat pump.
This is the location of the heat pump, under the rear bed.
I ordered a custom made hatch door to fit the dimensions of the opening for the heat pump.

The removal was pretty straightforward. I disconnected the electrical supply and the wiring for the thermostat. The unit was anchored to the floor in a few places and the external grill was easy to remove.

The heat pump is a beast. It weighs about 75 lbs.
The new hatch door fit perfectly and provides easy access to the new storage space.
This storage space will be very functional for storing larger items

I also converted the “sofa” design into a more permanent bed platform. I cut a plywood sheet to fit and installed a piano hinge to make it easy access the space from inside, if needed. This is especially important for working on the water utilities to the right of the space. This platform will hold a twinXL mattress and also give room for some storage bins to hold clothes and linens.

By removing the heat pump and converting the space for storage, I can stash larger heavier items at the rear of the trailer. This will take some weight off the trailer tongue, providing better balance to the trailer.

– + –

Folsom Lake weekender

Folsom Lake is about 15 miles from home – this is the closest to home that I’ve camped, except maybe my driveway. Two other couples had planned to camp on this weekend and invited me to join them. I guess that made me a “fifth wheel” camper. 🙂

The campground has a section for tent camping (no hookups) and RV camping, with full hookups. The spaces are large with quite a bit of room and foliage between them. Restrooms were also available.

The RV camping section has full hookups

The water level at Folsom Lake has been extremely low due to drought conditions. We all walked down to the water level; the terrain looked a bit moon-like. It was extremely windy, so we stayed close to the campsites for the rest of the time.

This spot would be underwater during a normal rainfall season.

For one of the couples, this was the maiden voyage in their new large pop-up trailer. This gave them a chance to test out the functions and features of their new trailer. The other couple was camping in their T@B large teardrop trailer. It was a fun weekend of hanging out, telling stories and eating great food. We even had some baking experiments. The new pop-up trailer has an oven, so they baked cinnamon rolls and other goodies. I baked up some brownies (from scratch) in my Weber grill, using an indirect heating method. They came out great, so this was a good chance to experiment with that method. With being so close to stores, any cooking mishaps could have been easily remedied with a quick drive. Fortunately, that was not necessary.

This weekend also gave me a chance to test out the new refrigerator. It worked great, so I’m going to declare that replacement project a success.

I’ll remember this campground for the future, especially if I’m itching to get out and don’t want to drive far. There are plenty of bike trails in the area, for both mountain biking and paved trail rides. And I’m sure a pizza delivery could be easily arranged, too, if so desired.

– + –

Reefer Madness

After a few road trips, it became apparent that the Dometic 3-way refrigerator was not working. To measure its performance, I used a remote thermometer with two temperature sensors – one located in the freezer compartment and the other located in refrigerator compartment. The unit would usually cool down initially and act like it was fine, but after about a day, it would warm up rather quickly. It would get even warmer than the surrounding temperatures. On the trip to Truckee, one night the temperature outside was 34°, inside the trailer it was 44°, and the freezer compartment was 56°!

I spent a couple of weeks troubleshooting the refrigerator, trying various fixes suggested by YouTube University. I removed the refrigerator from the cabinet to give me better access to it. One of these fixes (I dubbed the “Shake and Bake” method) involved turning on the refrigerator, once it warmed up, I shut it off, then layed it on one side and lifted it up and shook it several times. Then I turned it completely upside down and let it cool down. The next day, I did the same method, with the refrigerator laying on its other side for the “shake” action. The theory behind this fix was to loosen some of the internal chemicals in the tubing, assuming it had crystalized and hardened over the years. It was an interesting idea and it was fun the shake and bake the refrigerator, but it didn’t fix it.

I located a new refrigerator at Camping World in Vacaville and drove there one morning in early February to buy it.

The new refrigerator is on the left, the old one is on the right

Before installing the new refrigerator, I wanted to add some insulation to the cabinet space around the refrigerator opening. This should help the refrigerator operate more efficiently, especially in warmer weather. I also replaced a couple of the computer fans inside the rear part of the opening.

Before – no insulation inside the cabinet space
After – 1 1/2″ insulation installed on the side walls and inner ceiling of the compartment

I quickly learned that the refrigerator is larger than the doorway of my trailer. I assume the trailer was built around the refrigerator. I had dismantled the old refrigerator, allowing me to remove it through the doorway. I knew I would not be able to do that to the new one. Fortunately, the folding design of my trailer provided a solution. I left one wall folded down and placed a “gangplank” across the opening. This allowed me (with help from Bruce) to lift the refrigerator onto the gangplank, slide it across the trailer, and lift it down to the floor.

The gangplank was supported on the far side by some wood blocks to keep the weight off the folded wall

Before installing the new refrigerator into the cabinet, I tested it for several days and it performed flawlessly. I tested both the electric and propane settings. The new refrigerator was an exact replacement – it fit snugly in the opening and the propane fitting aligned perfectly. I am hopeful that I can count on it to work the way it’s supposed to work for many road trips.

– + –

Jackson Rancheria RV Park in January

Claudia and Bruce reserved a few days at the Jackson Rancheria RV Park, located at the casino near Jackson, California. I gladly accepted their invitation to join them. The RV park is very clean, with grass areas between the parking spaces. The park is located near the top of a ridge, and as a result, we had some very strong winds on the first night.

We explored the surrounding area, including a short trip to Sutter Creek, a nearby gold country town. It was a pleasant walk along the main street, although many of the businesses are closed on a Tuesday.

Main Street in Sutter Creek
Sutter Creek winds through the town
I thought this pipe wrap looked like a giraffe

We also checked out some of the gold country artifacts in Jackson. The Kennedy Tailing Wheels Park featured a couple of large tailing wheels from the mining operation in Jackson in the early 1900’s. One of the tailing wheels is still standing while the other one had collapsed. A few years ago, the standing tailing wheel was encased in a large building to protect it.

This tailing wheel had collapsed – it is still part of the display at the park
This large building surrounds a tailing wheel.
I took this photo of the tailing wheel in the late 1970’s, before it was enclosed by the large building.
Looking through the tailing wheel, the Jackson Mine is visible in the distance.
The same view about 45 years ago.

On Wednesday, we ventured to Pardee Lake Recreation area and Camanche Reservoir, both about 10-15 miles from Jackson. The dam at Pardee Lake is unusual. The road on the top of the dam is one lane width, so traffic is controlled by stoplights at each end of the dam.

Pardee Lake and dam
The stoplight controls traffic on the one lane road on the top of the dam
It was rather eerie to drive on the top of the dam. I couldn’t stop to take a look.

On Thursday, I drove in to Jackson to run a couple or errands. While in town, I took some photos at a local cemetery and an Orthodox Church. I also went back to the tailing wheels for another shot of a different wheel. It is closer to the Jackson Mine.

The Serbian Orthodox Church in Jackson
Another tailing wheel

We headed for home on Friday. Even though the RV Park is part of the casino property, we didn’t venture into the casino. The weather on this trip was pleasant, especially for January. The Jackson Rancheria RV Park is another great destination that isn’t very far from home. The gold country area is a great place to explore rustic settings and small towns with plenty of history.

– + –

49er Faithful

The fallen leaves were plentiful on the grounds

December’s road trip stayed closer to home. We went to Plymouth to stay at the 49er RV Village. The 49er Village is a large RV park located alongside Highway 49 as it passes through Plymouth. The park has a nice open feel to it, with plenty of trees and a small water feature. Apparently, spaces near the water are priced a little higher due to the attraction. I assumed that the attraction was some ducks.

Most of the park’s normal amenities were closed due to Covid, but the restrooms and showers were open, and were modern and clean.

A few day trips were in order. We started with a short drive to Apple Hill for lunch (including pie) at Boa Vista Orchards. We drove around the Apple Hill area, but many of the farms were closed during the week. On the way back from Apple Hill, I took a side trip to the little town of Fiddletown. My oldest brother used to live on some acreage near Fiddletown and I wanted to check out the area. I managed to locate the driveway to his former property.

Fiddletown consists of a number of buildings and houses in a cluster along Fiddletown Road. I stopped at an old building that used to house a blacksmith shop. The front porch of the building was loaded with old machinery, wooden wagon wheels and an old safe among other things.

The front porch of this building was scattered with antiques. The side yard was a massive jumble of more.
This old scale had some interesting colors.

On the next day, we drove to the Calaveras Big Trees State Park near Arnold, California. The park consists of two groves of giant sequoia trees. It was reasonably quiet at the park, not many visitors. The visitors center was open with Covid restrictions. The hike through the park was breathtaking, the trees are massive.

The trail begins with an enormous stump, big enough for a dance floor.
I used an ultra-wide angle lens to capture the full height of the trees.
Bruce and Claudia pausing to take a photo.

That evening we learned that the RV Park would be closing in a couple of days due to new Covid restrictions. In addition, the forecast called for rain to begin moving into the area. Since this was going to be our last night anyway, we decided to head home that evening. It turned out to be a good decision as it started raining on the way home. I preferred that to taking down camp the next day in the rain.

The 49er RV Village was a good destination. The location is in good proximity to several day trip opportunities spanning in several directions. A grocery store is located across the highway and some interesting eateries are located in town. Maybe another visit after the restaurants open up will be in order

– + –

Russian River in November

Casini Ranch Family Campground – Drone photos by Bruce Prichard
That’s my trailer at the bottom of this image.

November was a good month to camp near the Sonoma Coastline. The Casini Ranch Family Campground is just a few miles inland along the Russian River. The RV Park is well maintained with a variety of spaces. I chose a space along a wooded area, with the river a couple hundred yards behind me. Other spaces were available nearest the beach area. The weather was great for most of the week; the rain started about the same time we were packing up to leave on Friday.

Our first full day was Tuesday, November 10th. We drove over the nearby Korbel winery for some champagne tasting. Social distancing was in full effect during the tasting session. The champagne was good, however, in the gift shop I purchased a small bottle of Korbel brandy. 

Continue reading “Russian River in November”

Maiden Voyage – Coachland RV Park in Truckee, CA

First trip out – four nights at Coachland RV Park in Truckee

My first adventure in the Expedition was only about an hour and a half away, in Truckee, California. Claudia and Bruce had booked four nights at Coachland RV Park and invited me to join them, so I jumped at the chance to try out the new trailer. We had adjoining spaces between some tiny home rental units in the park.

Coachland RV Park is along the eastern edge of Truckee, just off Highway 89. It is a convenient location for mountain adventures, including Squaw Valley, the north shore of Lake Tahoe and other lakes in the area. The RV Park has numerous sites with full hook-ups, an updated laundry room, restrooms with showers and a good-sized community room. Most of the other amenities were not open due to the Covid shutdown.

Breakfast!

Our first morning began with what is becoming a tradition for us: scrambled eggs, bacon, pancakes and mimosas! After breakfast we ventured out (in separate cars) for a nice hike along Sagehen Creek Trail, just a few miles north of Truckee. 

Sagehen Creek
Fall colors

After the hike, we explored a couple of campgrounds in the area, as potential future destinations.


On our second day, Thursday, we drove the other direction along Highway 89, towards the north shore of Lake Tahoe. We stopped briefly at a roadside parking area to check out an old shack nestled among some aspen trees. 

We continued on, past Lake Tahoe into Nevada, to Spooner Lake for a short hike around the lake’s perimeter.

On the way back from Spooner Lake, we stopped at beautiful Sand Harbor Beach along Lake Tahoe’s north shore. This location is very popular and often crowded during the warmer months. Fortunately for us, it was a little later in the afternoon and most of the people had already come and gone.

Sand Harbor Beach on the north shore of Lake Tahoe
Beautiful clear water of Lake Tahoe
Claudia and Bruce at Sand Harbor

On Friday, our last full day, we had planned to stay at the campground. Around midday, I noticed an unusual number of fire and law enforcement vehicles gathering in the campground. Shortly afterward, a couple of police officers came over to the campsite and told me that we needed to evacuate the campground. A few spaces over, an individual had barricaded himself inside his RV and was threatening to turn on the propane. So, Claudia, Bruce and I headed over to a brewery for some lunch and cold beer. We stayed there a few hours, but still no indication that we could return to our campsites. We went back to the RV Park and learned the evacuation order was still in effect. We waited near the entrance for a few more hours until the “all clear” signal was delivered. No explosions. What an unusual way to end a camping trip.

All entries to the RV Park were blocked for several hours

Overall, my trailer performed well. I had some issues with the refrigerator. The first day or so it seemed to work fine, but suddenly it began to warm up. It was more drastic than just not cooling, it was actually getting very warm. I use two wireless temperature sensors to monitor the temps inside the freezer and fridge compartments. During the night, the outside temperature was 34°, the room temperature of my trailer was 44° and the freezer compartment was 56°. I knew this was a problem and turned off the refrigerator for the remainder of the trip. I had brought along an ice chest as a backup solution and put into service.

I knew I would be dealing with the malfunctioning refrigerator in the days ahead. I wasn’t surprised by the problem, the couple who sold me the trailer warned me that they had trouble with it; their solution was a Yeti cooler. 

With the cold temperatures overnight, it was cold inside the trailer. I used a small ceramic heater for heat at night and my sleeping bag kept me toasty, as long as I stayed inside it and kept it zipped up.
Otherwise, no complaints on the trailer. We headed back home for more tinker-time!


– + –

Before hitting the road, a few fixes and upgrades

Old anode rod on the left, new one on the right

One thing is certain, this trailer will satisfy my need to tinker with stuff. 

Before I was ready to test out the trailer on the road, I wanted to do some important maintenance tasks as well as start to make it “my own.” 

Some of the maintenance tasks I performed first:

  • Tested all the components: electrical, water systems, propane appliances.
  • Serviced the wheel bearings.
  • Disinfected the fresh water storage tank.
  • Replaced the water pump (the bypass valve was malfuntioning and allowing “city water” to fill the water storage tank)
  • Replaced the anode rod in the water heater (see above, it needed it!).

In order to make the trailer more functional and comfortable, I also:

Replaced the dinette table with a smaller and lighter folding table. The original table was very heavy and also served as a bed platform that would span the dinette benches, making the dinette into a twin bed. I don’t have a need for a twin bed at this time. The new folding table easily folds down for travel and can be used outdoors if desired.

The original dinette table was large and heavy.
This folding table is much lighter and takes up less space.
Directly behind the table, I built a small shelf to hold some of the plastic storage bins I use for organizing all the various tools and supplies.

Installed two closet rods that mount between the folding side walls. These rods provide more stability to the walls, taking stress off the locking latches during strong winds. The rods also give me a place to hang small towels. I built two lightweight shelf pieces that rest on the closet rods. These shelves provide easy access to light items, such as coffee-making supplies, first aid kit and snacks. I installed small LED puck lights on the underside of the shelves to provide additional task lighting.

Removed this small microwave oven and finished out the cabinet space it used to occupy, giving me additional storage space. 

Cut an access opening and made a new compartment door to gain easier access to the storage area under the bed. After making the new compartment door, I decided to replace all the cabinet doors with new matching ones.

This new opening allows access to the storage space under the rear bed.
New cabinet door under the bed.
New cabinet doors, including a new door made to cover the former microwave oven opening.
New cabinet doors for the kitchen storage and commode.

Purchased a folding solar panel and created several connecting cables for keeping the trailer battery charged while dry-camping.

This was enough work to get the trailer ready for its maiden voyage. 

– + –